Search This Blog
Wednesday, August 29, 2018
29 August 2018 - driver side radiator grille - headlight door grille mod
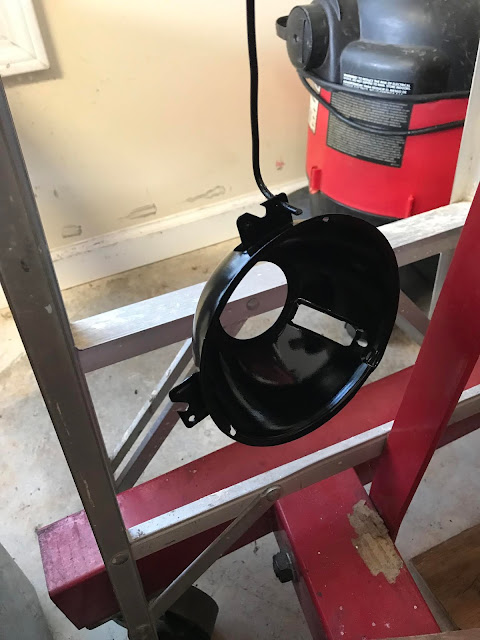
Today I painted the LH, LL headlamp cups/holders/buckets with chassis saver. A fine layer of rust had formed on both pieces so I thought I would use the chassis saver and see how that works. I painted one coat at around 5pm and the instructions indicate that another coat can be reapplied in 3-6 hours.
Tuesday, August 28, 2018
28 August 2018 - driver side radiator grille
After soaking the LH, LL headlamp buckets/cups in Evapo-Rust for a few
days, I removed them, cleaned them up and prepped for painting. I
painted a couple of light coats of rust converter. The pieces flash
rusted!?!?!? So that rust converter seemed like a good idea. Both
pieces are now drying and in about 24 hours I will paint a top coat of
VHT chassis and rollbar black(satin) or maybe the gloss black. Once
that dries/cures for a couple of days I should be able to reassemble the
grille and install!
Monday, August 27, 2018
27 August 2018 - Driver side grille - headlight door grille mod
The headlamp buckets/cups have been soaking for a few days. The
majority of the rust is gone, but there are a few areas of deep pitting
on both pieces. I will let them soak for a couple more days.
Once those two pieces are ready the driver side grille can be re-installed.
Once those two pieces are ready the driver side grille can be re-installed.
Saturday, August 25, 2018
25 August 2018 - headlight grille mod
I was able to install the passenger side grille and headlight grille mod today. That grille looks amazingly good to me! So since the driver side did not look that good but was installed, I decided to remove the driver side grille and paint the headlight door grille to match the passenger side.
I decided to not use the door springs that each door has installed. On the passenger side I was thinking of a way to secure the headlight door hinge/grille assembly. I came up with the idea to use a 5/16-18 bolt 5" long and a 5/16-18 bolt 3" long. The headlight door hinge has two door adjustment locations; one to adjust how far back the door opens and one for how far down the headlight door closes. The 3" bolt is used for the headlight door closing position and the 5" bolt is used for how far back the door opens.
Prepped, cleaned and painted the three nuts that are used for spacers for the grille to headlight door hinge spacing. Also cut off the spring mounting tabs located on the door hinge. I ground those down and painted them.
Currently the headlight buckets/cups are soaking in Evapo-Rust. Once they are cleaned they will be painted.
The following four pictures show the hardware used to keep the door hinge/grille secure
Here is a shot, both sides installed; passenger side grille was painted with "blackout" treatment. The driver side grille is unpainted. I did that to compare which way I like it. Looks to me the passenger side is the way to go. I am in the process of disassembling the driver side grille and painting the grille.
 |
| Driver side with radiator grille removed. So far the area looks pretty good after two years! |
 |
| The headlamp buckets/holders are rusting just like the passenger side...so I will remove, clean and repaint... |
 |
| The headlight vertical and horizontal adjusters are about to be replaced since I have all of this apart... |
Sunday, August 19, 2018
19 August 2018 - passenger side grille - headlight grille mod
I continued with putting together the grille by installing the headlamps into the headlamp cups/holders and installing those assemblies into the grille assembly. I installed new vertical and horizontal adjustment fasteners and plastic inserts for headlight door. While I was adjusting the vertical/horizontal screws, the high beam horizontal adjuster failed. The plastic insert seperated so I had to remove it and install another new one. Also I forgot to mention that the vertical/horizontal adjusters are mounted to the grille with two screws each. One of the high beam horizontal mounting points, had a stripped thread. I happen to have a couple of 8-32 screws and nuts with nylon inserts. I used that hardware to install the horizontal adjuster. Didnt get pix but I will next time when I install the grille assembly.
Saturday, August 18, 2018
18 August 2018 - purchased rear tail light grille assemblies
Yesterday I received a left and right set of rear tail light grille assemblies. They are in very good shape. I am in the process of cleaning up the parts.
Friday, August 17, 2018
17 August 2018 - passenger side grille - headlight grille mod
I was able to paint the headlamp buckets/cups today with VHT rollbar & chassis gloss black. I have set them a side to dry. I also painted a few pieces of mounting hardware to see how that goes.
 |
| The three nuts are what I was trying to paint here... |
 |
| Add caption |
 |
| heres a better image of the pieces |
 |
| This is a headlight door hinge that is soaking in evaporust |
 |
| better shot of the results |
Tuesday, August 14, 2018
14 August 2018 - headlight grille mod - passenger side grille
I was able to paint the high and low beam headlamp cups/buckets a basecoat before the rainy weather today. I still have to paint/coat the mounting bolts,fasteners and hardware.
Once the basecoat is dry, which should be by tomorrow, I will put down two coats of VHT chassis and rollbar - gloss black. I am hoping to get everything painted by tomorrow to be able to put together the passenger side headlight grille during the weekend.
Once the basecoat is dry, which should be by tomorrow, I will put down two coats of VHT chassis and rollbar - gloss black. I am hoping to get everything painted by tomorrow to be able to put together the passenger side headlight grille during the weekend.
Monday, August 13, 2018
13 August 2018 - headlight grille mod - psasenger side
I cleanup the two headlamp buckets/cups and prepped them for painting. I also have the bolts, fasteners, springs and clips ready for paint.
I applied tape to the headlight door grille and then painted a couple of coats of VHT Gloss black. I didn't realize I had painted bother radiator grilles the gloss black. So now that headlight door grille is drying in the garage. Tomorrow if I have time I will paint the two headlamp cups/buckets.
I applied tape to the headlight door grille and then painted a couple of coats of VHT Gloss black. I didn't realize I had painted bother radiator grilles the gloss black. So now that headlight door grille is drying in the garage. Tomorrow if I have time I will paint the two headlamp cups/buckets.
Sunday, August 12, 2018
12 August 2018 - Passenger side grille mod
Still working on cleaning up the hi and low beam headlight cups/buckets. Both of the parts are soaking in evaporust and should be ready for primer tomorrow. The fasters and screws are also soaking in evaporust.
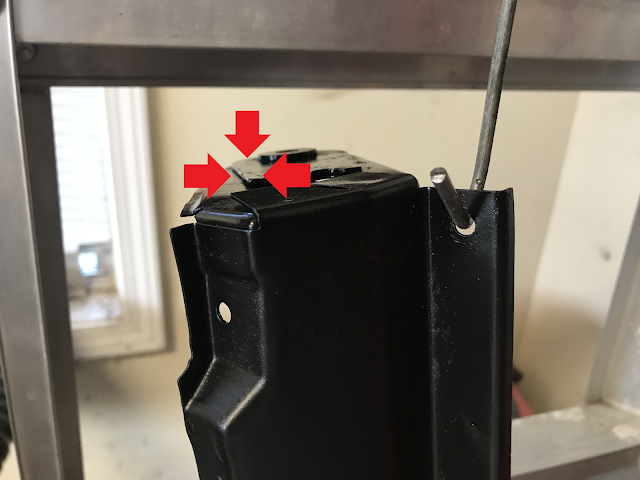
After looking at the driver side grille, its looking like I might need to paint the headlight door grilles so they match more closely the rest of the grille assembly. This photo has arrows that indicate the differences in the blackout treatment and the clean look. I think I will leave the driver side grille as is for the moment but the passenger side grille I will paint the headlight door grille with a semi-gloss black to see if it will more closely match the grille.
After looking at the driver side grille, its looking like I might need to paint the headlight door grilles so they match more closely the rest of the grille assembly. This photo has arrows that indicate the differences in the blackout treatment and the clean look. I think I will leave the driver side grille as is for the moment but the passenger side grille I will paint the headlight door grille with a semi-gloss black to see if it will more closely match the grille.
Wednesday, August 8, 2018
8 August 2018
Today I received the parts I ordered from WCCC. This weekend if I finish this week, I will put together the passenger side radiator grille and complete the mod of the headlight doors.
Today I also painted one of the two headlight lamp cups/holders. The other one still is soaking in the evaporust.
Today I also painted one of the two headlight lamp cups/holders. The other one still is soaking in the evaporust.
Tuesday, August 7, 2018
7 August 2018 - passenger side headlight door mod
Sunday, August 5, 2018
5 August 2018 - Headlight grille mod - passenger side
Since I have the passenger side radiator grille completely apart I decided to paint what ever needs painting. I discovered that one of the mounting points for the headlight assemblies is damaged. WCCC has a "patch" that can be installed to deal with that type of damage. I ordered the part and when it comes in I will install it.
 |
| This is the image of the clip that WCCC sells. |
 |
| Passenger side radiator grilles. The headlight door/hinge assembly has been modified and is ready for installation. |
 |
| The passenger side headlight holders/cups soaking in Evapo-Rust |
Subscribe to:
Comments (Atom)


