Search This Blog

Thursday, October 29, 2015

29 October 2015 - Oil Plug - VIN Reference Images

Reference images

Rear 3 threaded oil galley plugs

rear 3 threaded oil galley plugs

front 3 oil galley press in plugs


Wednesday, October 28, 2015

28 October 2015 - VIN Information

Engine block date code information:

C6AE-6015-C

7G12

7=year=1967
G=Month=AUGUST
12=Day =12

Sunday, October 25, 2015

25 October 2015 - Engine block numbers

Reference images of a 289 small block ford that is being disassembled.


Rear top engine, oil galley press in plug


Thursday, October 22, 2015

22 October 2015 - Replacement Engine from Summit Racing

Possible replacement engine for the Merc...

From Summit Racing:

ATK High Performance 1968-74 Ford 302 Stock Drop In Crate Engines HP99F
HPE-HP99F

Wednesday, October 21, 2015

Monday, October 19, 2015

19 October 2015 - Engine Bay Reference Images

Reference images of the heater hose connections and bypass hose location as well as a general view of the engine bay.


Sunday, October 18, 2015

18 October 2015 - Coolant hose replacement

Today I finished installing heater core hoses, radiator hoses, bypass cooling hoses.  Installed the carb and fuel line with filter.  Put coolant in the radiator topped it off and started it up for the firt time in a month or so.  The engine started just like it should but there is some sort of vacuume leak that was not there before the intake manifold removal.  Ran the engine for about 15 minutes or so to get air out of the coolant system and to check for leaks of any kind.  There were no leaks, coolant or fuel.  Did see that the electric engine temp gauge indicates around 220 degrees but the mechanical gauge reads a steady 190 degrees.  Also checked the dipstick for coolant in the oil after the 15 minute run and no coolant as of yet.  If the coolant leakage problem is resolved I will need to replace the oil again just to be sure the oiling system and bearings are ok.

Wednesday, October 14, 2015

14 October 2015 - ToDo list - Heater hoses/fushing system

Need to flush the heater core and radiator.   Need 5/8 to 3/4 coupling to connect garden hose to heater core hoses to flush heater core.

Need two couplings for heater core hoses...instead of removing heater core and installing new hose, get two 5/8" x 5/8" hose couplers (Dorman part number 56438).  Then only need to get 3-4 feet of 5/8" hose, install couplers and replacement hose, then good to go.

Alternate part number for 5/8" x 5/8" hose coupler

Murry Climate control - Hose splicer
84740 

Monday, October 12, 2015

12 October 2015 - Images of 68 I used own and the current 67 that I own

Images of a 68 I used to own and a of the current 67.


Sunday, October 11, 2015

11 October 2015 - Intake manifold installation info

Installed the intake manifold by 3 pm.  Torqued manifold to 20 lb-ft.  All manifold fittings were pre-installed.  Need to check intake bolts again in a few hours to deal with settling.

Installed the battery tray.

Cut four bolts 5/16 - 18 for use as carb mounting bolts.

Installed one of the carb mounting bolts and put RTV on the threads to seal it.  That mounting hole goes completely through the manifold into the intake passage. 

The red circle is the threaded hole in the manifold...that is where the carb stud screws down into from the topside...


Close up of the carb mounting hole that goes into the intake passage

Saturday, October 10, 2015

10 October 2015 - Intake manifold installation / ToDo

I cleaned up the intake manifold a second time, think I am done doing that.  I was unable to get the chemical cleaners to remove very much paint.  I'll just clean up what I have and finish preparing it for installation.

I have the sealers and gaskets for the intake manifold and thermastat and housing.  The plan is to install the intake this weekend and by mid week of next week have the engine running.
 
Installed the thermostat and housing on the manifold.  Will install manifold this evening or tomorrow.  Need to make sure to check/re-check bolt tightness/torque due to settling.

Friday, October 9, 2015

Thermostat housing

Removed some of the excess material inside...

Smoothed out the transitions of the thermostat housing


View from the other side...


This is the sealant to be used for the intake gaskets and manifold...

9 October 2015 - Part Numbers for intake manifold elbow to heater core inlet

Part numbers for intake manifold elbow to heater core inlet

C3OZ-18599-A

C2OZ-18599-B     1964-73 Silver Zinc Water Inlet Elbow 170-200  

C6AZ-18599-B     1964-73 Gold Zinc Water Inlet Elbow 289-302  

C6AZ-18599-S     1964-73 Silver Zinc Water Inlet Elbow 289-302

C6AZ-18599-C     1964-73 Chrome Water Inlet Elbow 289-302


F1590 01   heater elbow


intake manifold elbow

water inlet elbow

heater hose elbow


Thursday, October 8, 2015

8 October 2015 - Links for intake manifold installation/removal

Links


 http://www.mustangsteve.com/intake.html


https://www.youtube.com/watch?v=jgbrPjcd9XY

https://www.youtube.com/watch?v=2pYWTBh8mpc


Cleaned up all the intake manifold threads on the cylinder head.

Wednesday, October 7, 2015

7th October 2015 - Tool Wishlist

Tools

• Wheel bearing packer
• torque wrench
• wheel bearing seal/race remover/installer
• tap & die set
• ramps
• mechanics creeper
• mechanics creeper seat
• spark plug cleaner

http://www.harborfreight.com/pneumatic-spark-plug-cleaner-32860.html

Tuesday, October 6, 2015

6th October 2015 - Intake manifold installation/removal - Reference images

 Painted another coat on the battery tray today.  After it cures(two days) I will re-install it.

 Cleaned up the cylinder heads today.  The intake manifold and cylinder heads are now clean and ready.  Still need to pick up a sealer for the gaskets.  I have the intake maniflold gasket set(FelPro 1250).


Monday, October 5, 2015

5 October - Intake manifold installation/removal - Reference images


Need to paint a couple more coats on the battery tray and wheel well area the tray mounts to...probably do that tomorrow


This is what the gasket surface of the manifold looked like after soaking in soapy water and scraping off gaskets with a plastic scraper.

This is what the gasket surface looks like after using a scotchpad and about an hours worth of elbow grease.
Close up of the surface


Manifold removed, cylinder heads still need to be cleaned

Work bench layout, yeah it really is that tidy when a project is on going...

Sunday, October 4, 2015

4th October 2015 - Intake manifold installation/removal

Removed the intake manifold.  Looking at the intake gaskets I see where one coolant port looks like it leaked into the cylinder head.  The other coolant ports seem okay.

The manifold is a PITA to clean up!  Brake cleaner did an excellent job of removing most of the grease/oil/rust layers.

Isoprooyl alcohol seems to be a pretty good cleaner.  It removes fiber gasket material very well.
Surprisingly this bathroom cleaner with bleach made clean up a bit easier...

This works very well on grease/oil inside the intake manifold!

Use this general cleaning/soaking...

I used this initially, but it just does not clean as well as the bathroom cleaner!?!?!?!?


The part number for the cylinder heads is M-6049-Y302.

Here is a link to the cylinder head from Ford M-6049-Y302 


I bought four bolts to use as guide studs when I re-install the manifold.  Bolt size is 5/16 -18 x 3.

I also bought some bolts and fasteners to mount the battery tray.  I removed it to take care of some rust on the tray and in the area where the tray is installed.


Look up "right stuff" for installing gaskets.

Saturday, October 3, 2015

3rd October 2015 - Intake manifold installation/removal - The beginning

Started the process of removing the intake manifold.

Removed the carb.

The distributor has been marked so that it can be re-installed properly.

The tach green wire was cut to allow the harness it was a part of to be moved out of the way.  All other engine bay wires/connections are ok.

Drained the coolant from the radiator.  Removed the upper radiator hose, the water pump bypass hose and disconnected the heater hoses from the water pump.

From the intake manifold I removed the mechanical water temp sensor and brass manifold fitting and removed the thermostat housing.  Also the electrical water temp sensor was left in place but unplugged from the wiring harness.

There is alot of rust/corrosion seen in the thermostat housing and intake manifold.

The heater hoses had alot of rust particles/build up - need to purge the water fromt the heater before reconnecting/re-installing.

Might need to have radiator checked out/rebuilt - it too has alot of rust/corrosion buildup.

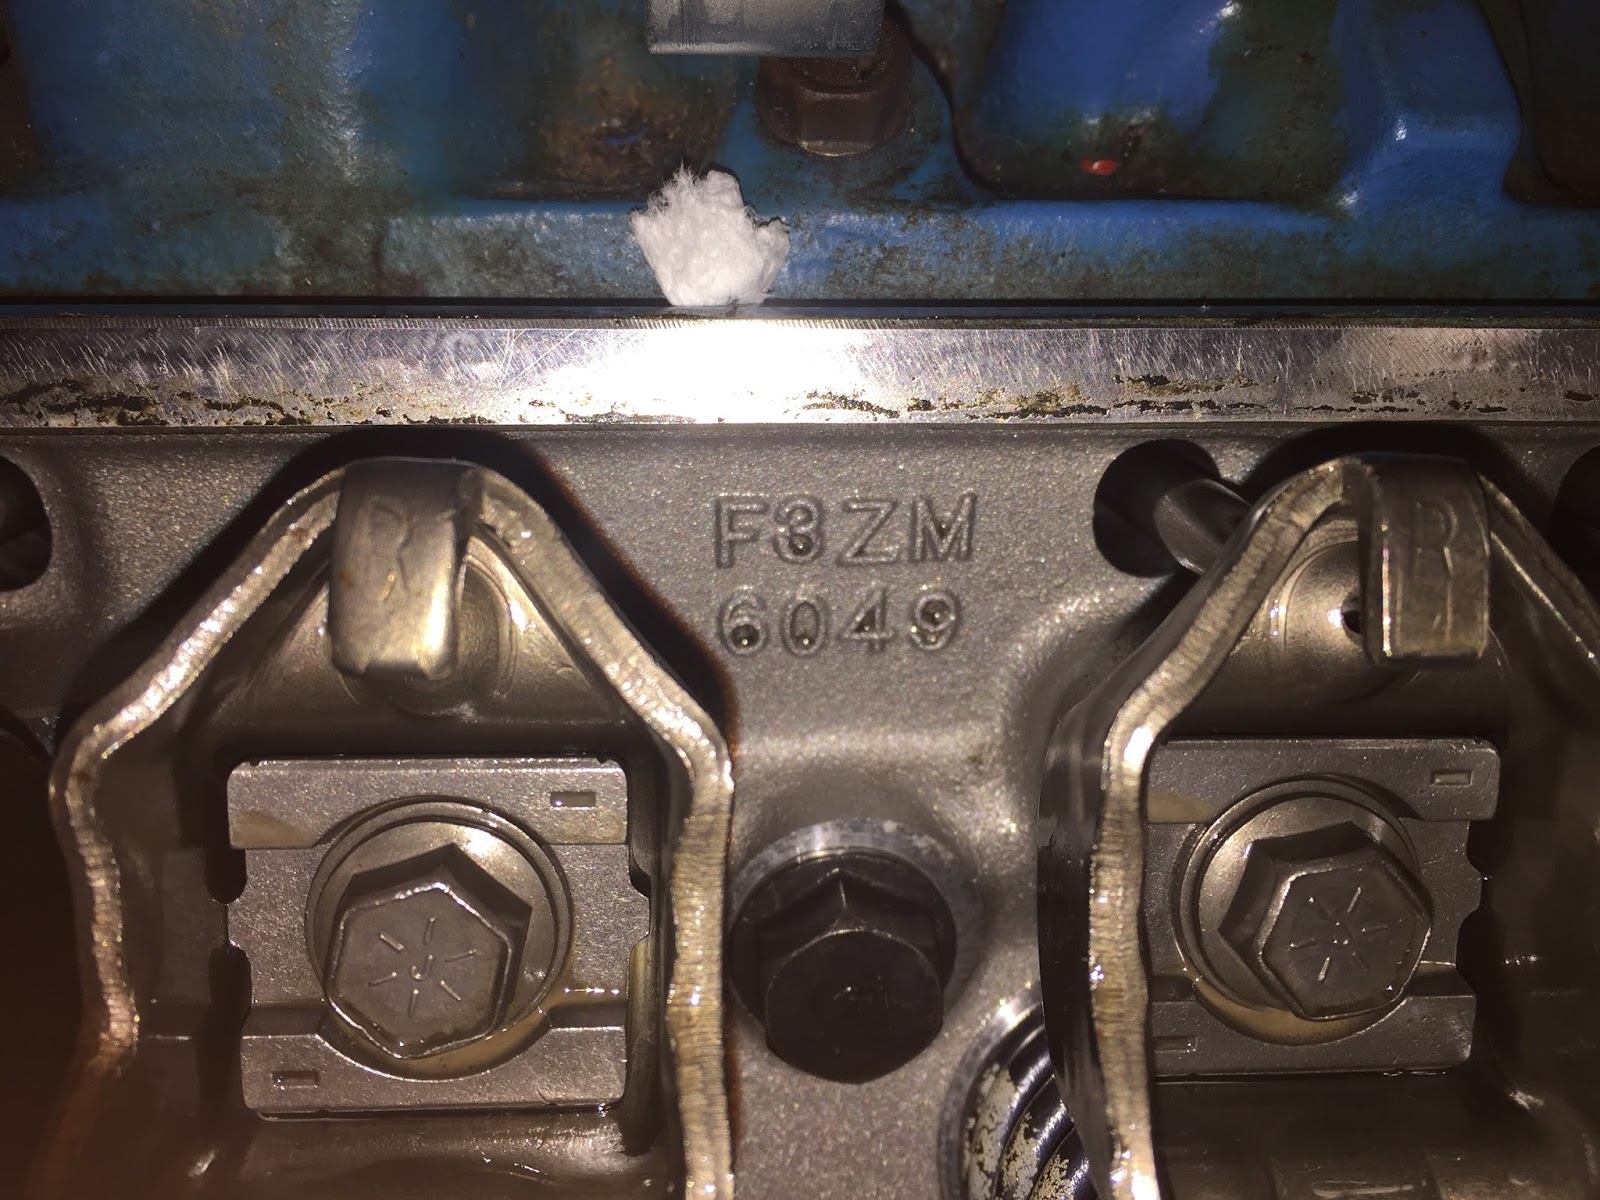
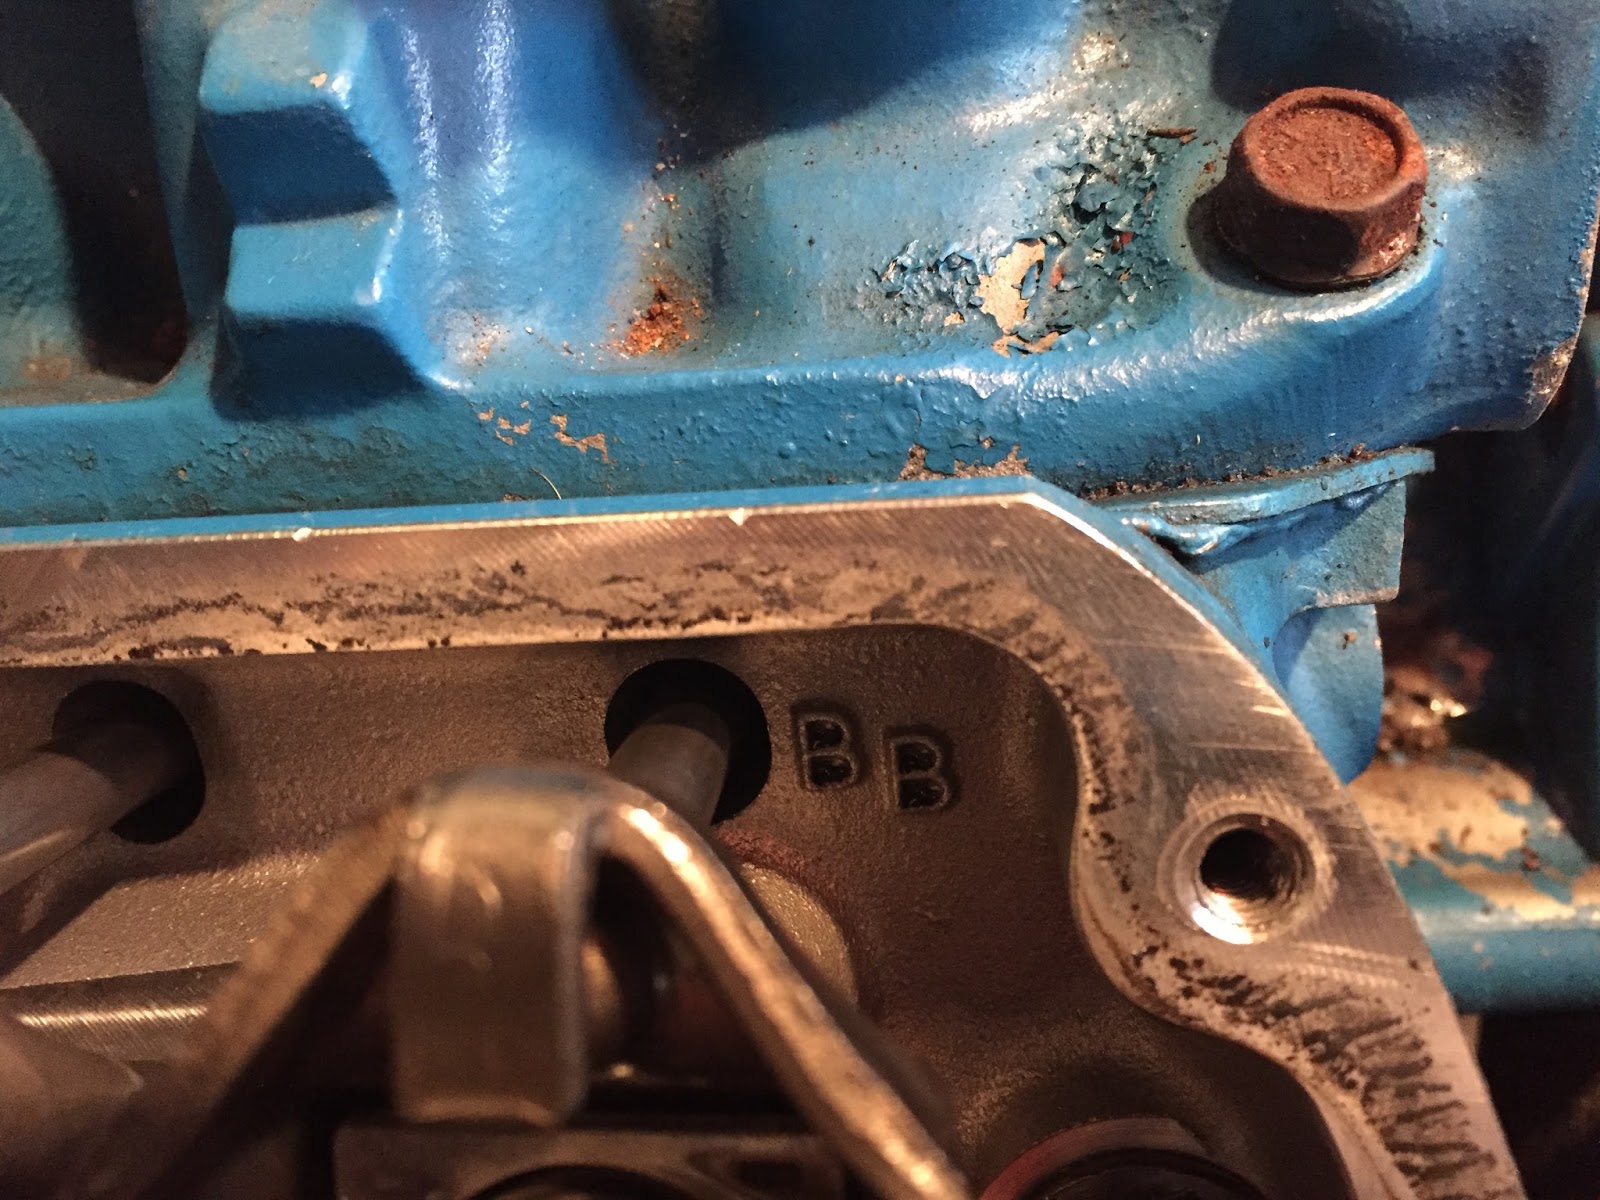
Check cylinder heads - there are water jacket inserts that may have rusted through to cause water in oil - remove both valve covers and check

Friday, October 2, 2015

3 Oct 2015 - Oil change - Oil looked like chocolate milk

Changed the oil yesterday and and found the the oil looking like chocolate milk!  So now I am troubleshooting to determine the source of the leak.  Radiator fluid looks good, plugs look ok too.   I will start with the intake manifold.  Tear down will begin as soon as I have all the replacement gaskets abd sealants.

Monday, September 28, 2015

28 Sept 2015 - Exterior images of 67 Cougar


Driver side Rear Wheel cover

3/4 Rear view
3/4 Rear View