Adjusted the starter motor positive cable so that it is further away from the header.
Friday, September 10, 2021
8 Sept 2021 - Starter failure
The starter failed today. The starter solenoid fell apart inside the starter. Removed and replaced it. While re-installing the positive battery, the terminal fell apart. Replaced that and now The Merc is operational. One problem I noticed after putting everything back together, was that I routed the starter cable a bit too close to the headers. Before I get out of the garage, I will adjust that cable location.
Monday, May 31, 2021
31 may 2021 - electric hide away headlight doors
Setup the DPDT relay and one actuator to verify proper wiring and function. Testing/checkout worked, now I can look into proper installation of the relay, circuit breaker and actuator wiring.

Here is a wiring diagram for the hardware.

Sunday, May 16, 2021
16 May 2021 - electric hide away headlight doors
Here is an updated pic of the mounting adapter. The spacing between the holes is now .17" and that allows the headlight door to be completely open and close

Sunday, April 18, 2021
18 APR 2021 - electric hide away headlight doors
Parts listing:
- waterproof terminal block
- 12 gauge wire, RED
- 12 gauge wire, BLACK
- DPDT 12VDC 20A relay with socket
- 15 amp automotive circuit breaker with protective cover
- ...
Wednesday, April 14, 2021
14 APR 2021 - electric hide away headlight doors
The original tension springs for the headlight door were installed. The lower headlight door lid will need two adjustable bumpers to allow for aligning the headlight door to the grille.
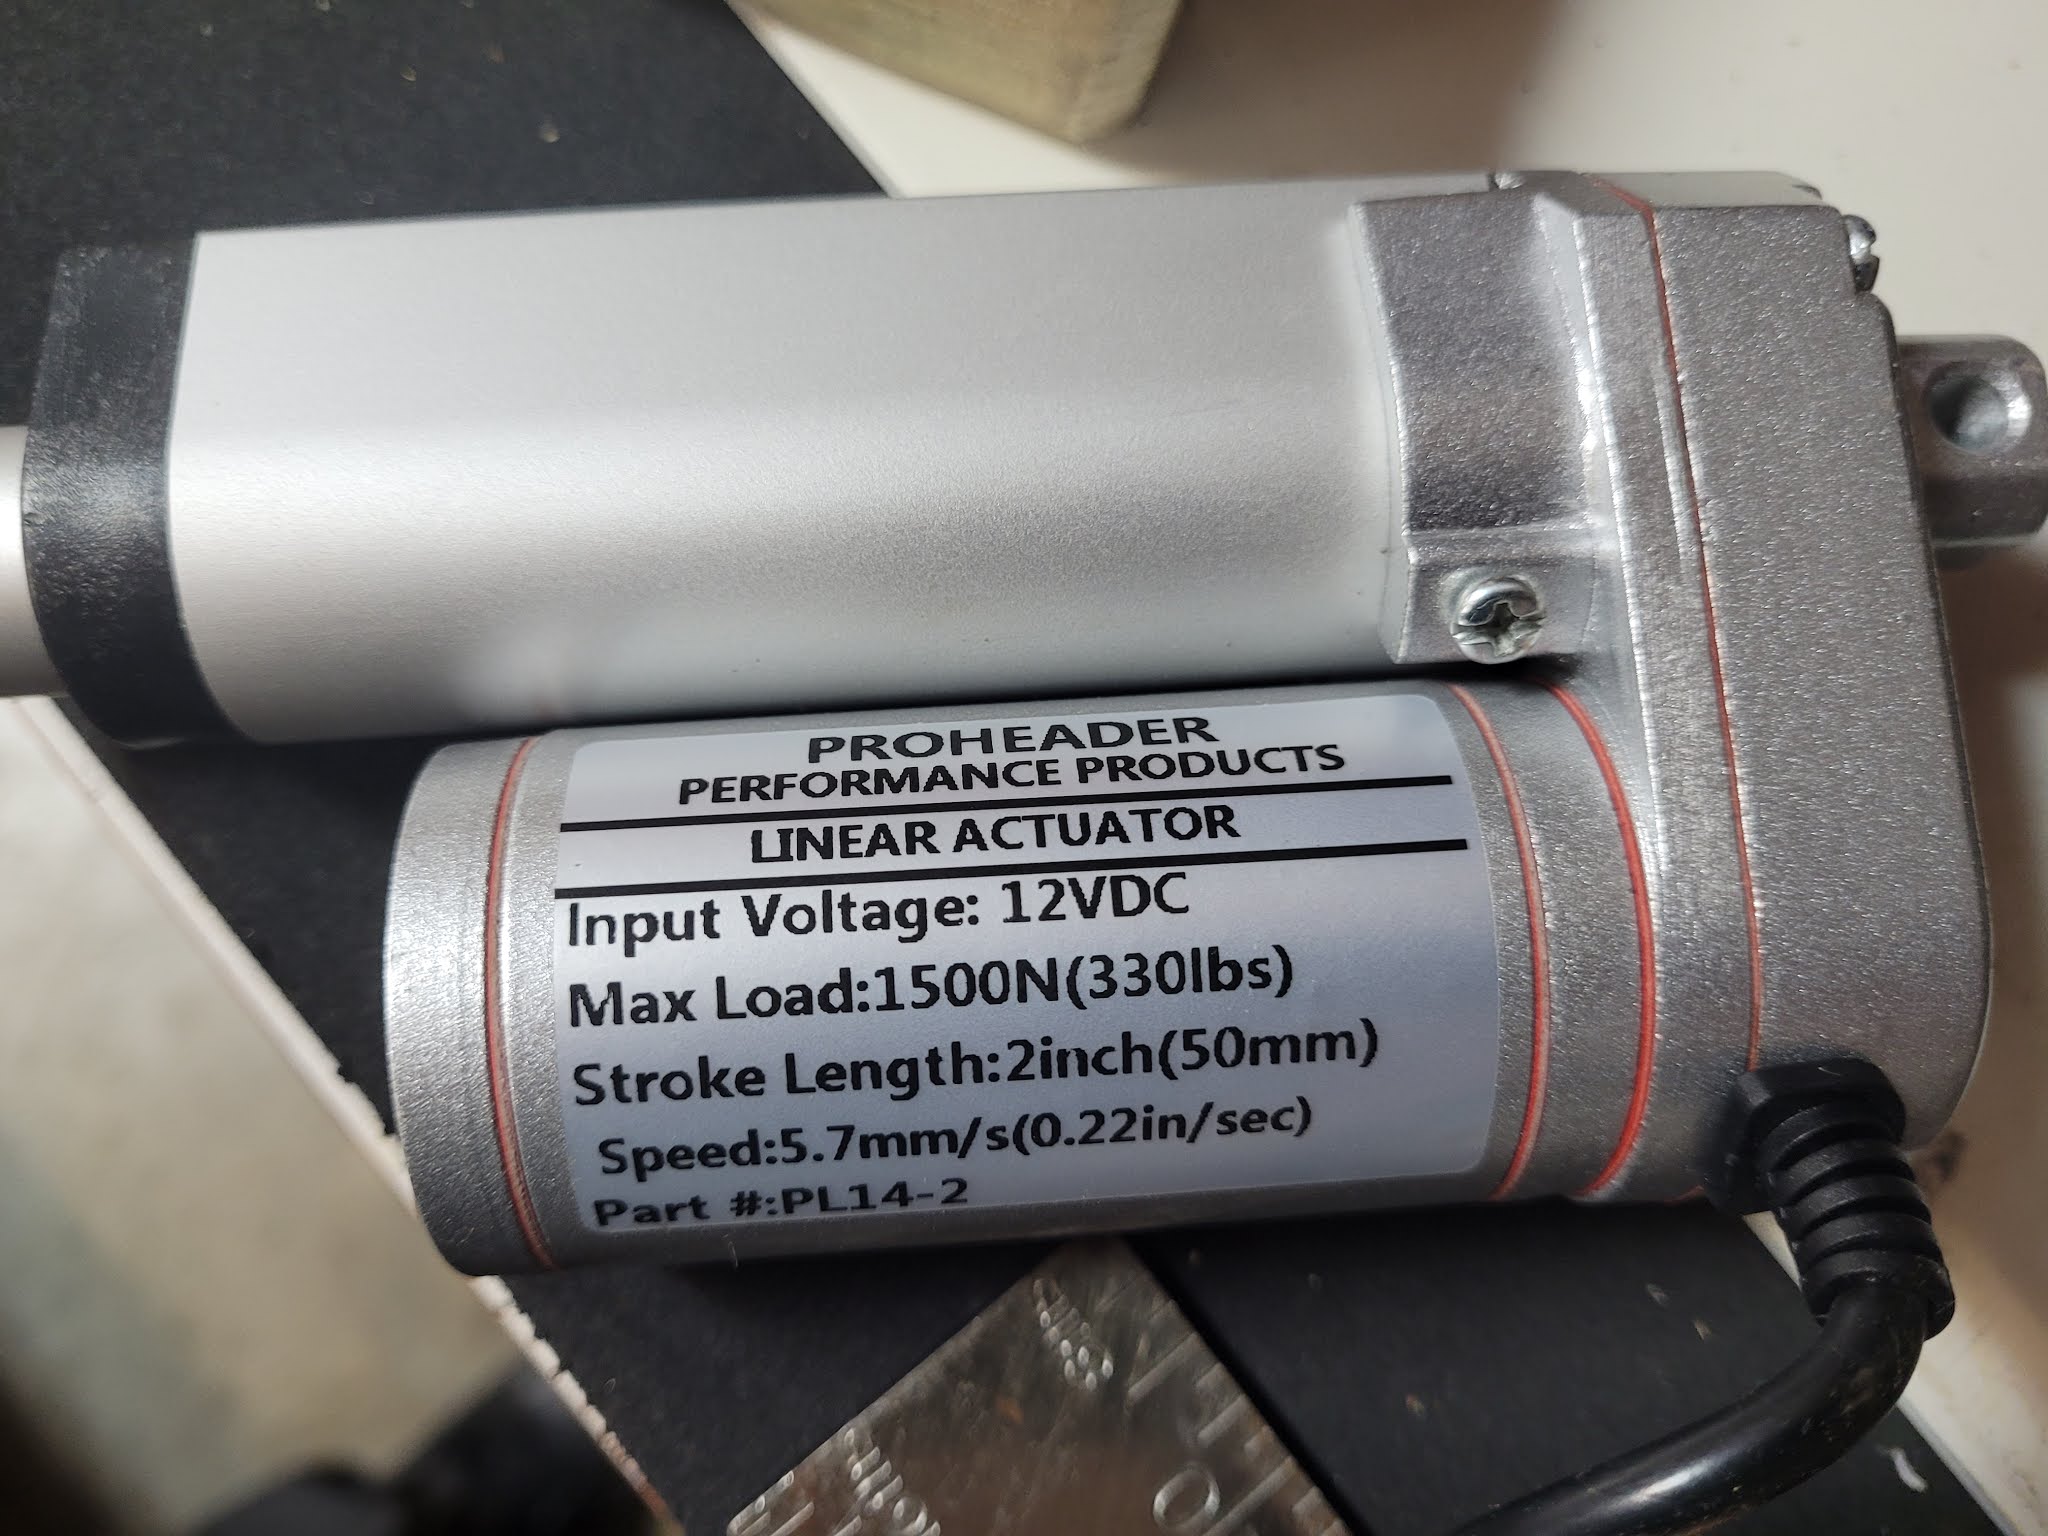
The linear actuator opens/closes the headlight door with ease. The tension springs help with keeping the headlight door in place. There is only one alignment adjuster on the door and its at the top of the headlight door. With the current linear actuator setup, that adjuster doesnt do much. So adjuster bumpers at the lower corners of the headlight door should resolve alignment issues.
14 APR 2021 - electric hide away headlight doors
Made a mounting bracket from the 3/4" EMT tubing. The piece is 1.55" in length. .92" in diameter. The two holes are .37" and .26". The .37" hole is the lower hole and that attaches to the headlight bucket factory mounting location of the vacuume motor. The .26" hole is where a 3/4" roll pin is pressed through the tube to the linear actuator.

Tuesday, April 13, 2021
13 APR 2021 - electric hide away headlight doors
I found, that EMT tubing/pipe is the diameter/size that I am looking for, that fits the end of the linear actuator. I bought 3/4" size EMT pipe.


Sunday, April 11, 2021
11 APR 2021 - electric hide away headlight doors
Today I put together a basic configuration for opening/closing the headlight doors. I used a 1.75" long piece of steel tubing fastened to the bottom of the actuator and that piece was then attached to the same location that the vacuum motor attaches to on the headlight bucket, I even used the same bolt. I attached the steel tube to the actuator using a 1/4" wide by 1" long roll pin. The two holes that need to be drilled into the 1.75" round tube are spaced at .8" at the center of the holes. The .8" distance needs to be shortened by .2", so the distance between is .6" for the next piece so that the head light door completely opens.
I made another fitting for the actuator. The piece is still 1.75" in length, the holes are centered at .70" for this piece. That was a .10" difference and didn't do much to open the headlight door. The next piece will have the holes centered from each other at .65"
 |


Saturday, April 10, 2021
10 APR 2012 - Electric hide away headlight doors
Several weeks ago I ordered several different sizes of linear actuators. The one size that seems to be useful is the with the two inch stroke.
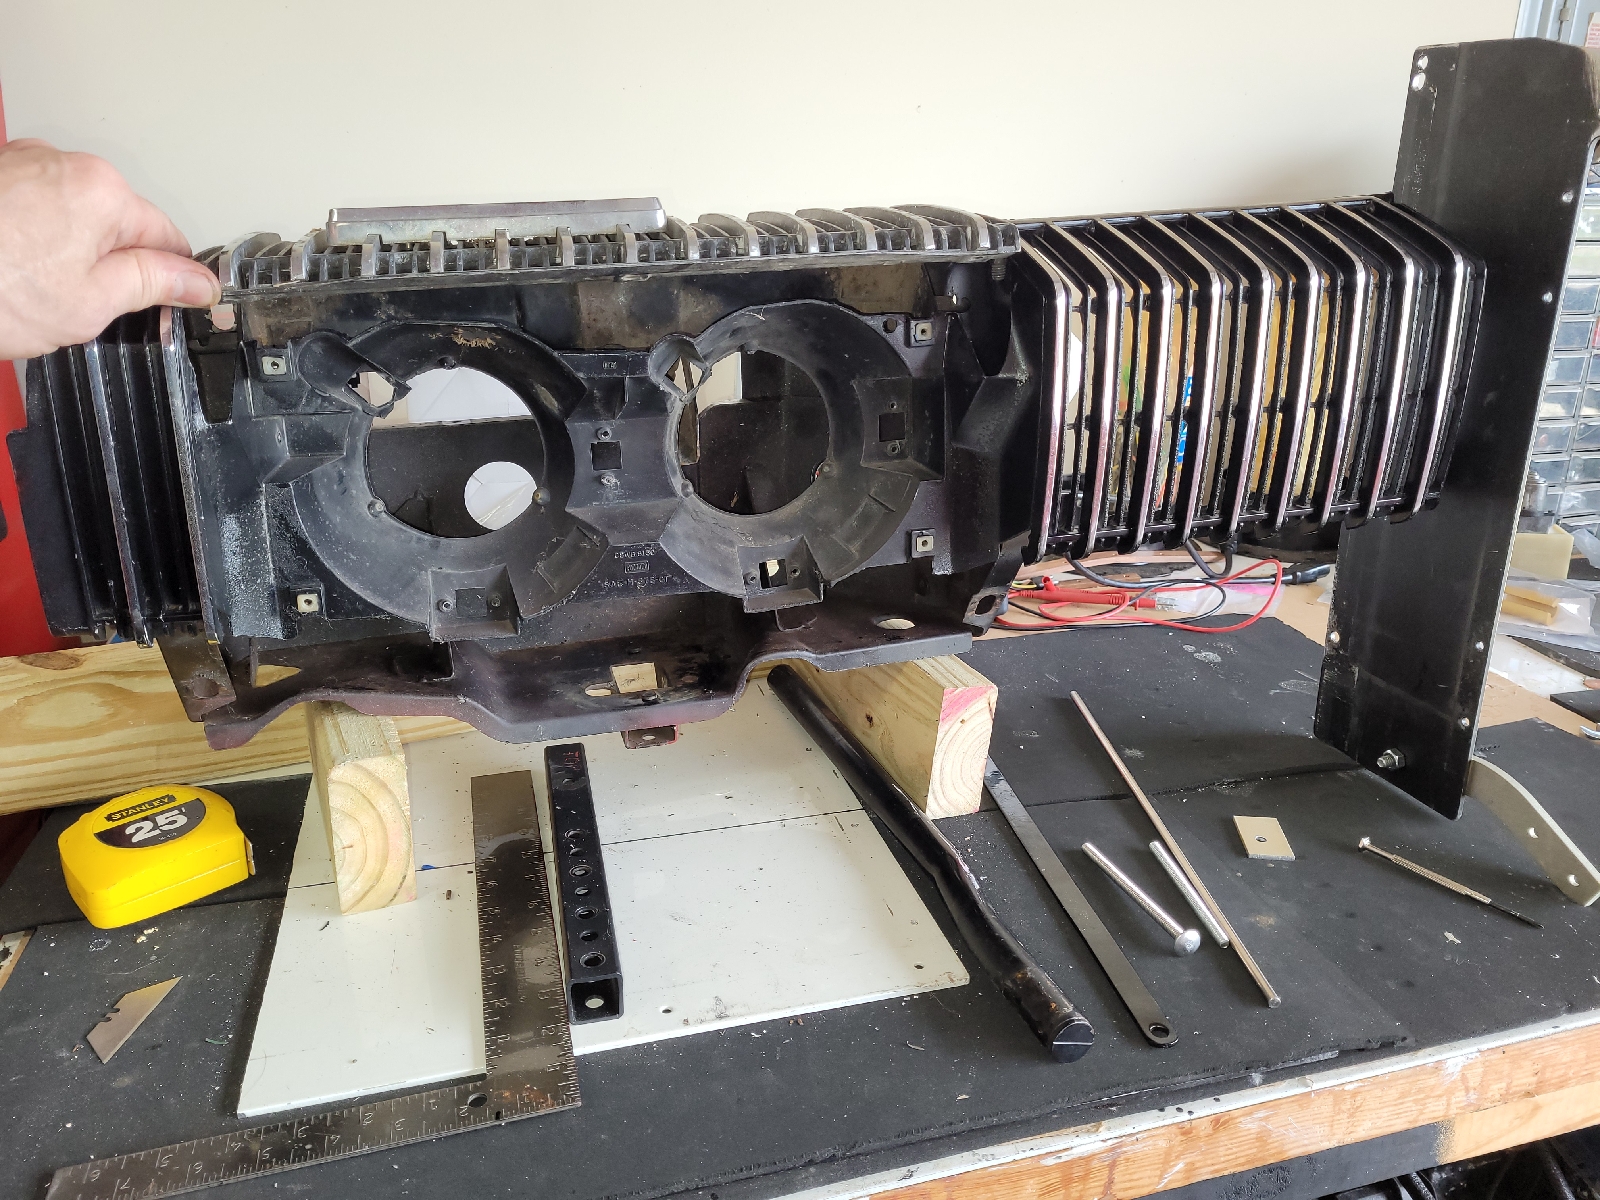


I put together a passenger side grille with a headlight door and headlight bucket. I'll be using that mockup to fine tune the actuator and hardware needed to open and close the headlight door.


'86 roller cam engine
I was able to remove one of three of the rear block oil plugs today. I sprayed a little PBlaster and will try again tomorrow.
Sunday, April 4, 2021
4 APR 2021 - '86 roller cam engine teardown
Removed the cam, lifters and anything else that was attached to the block. Could not find a part number on the camshaft or lifters. The block is completely empty/bare and ready for cleaning. The oil galley plugs front and rear of block need to be removed, coolant drain plugs on each engine side need to be removed. I sprayed PBlaster on those fittings and will see how they work out tomorrow.


 |
Saturday, April 3, 2021
3 APR 2021 - '86 roller cam engine tear down
Today the timing cover, timing chain set, pistons, rods and crankshaft were removed. All bearings are standard, the pistons are standard bore. Pistons 4,6,7,8 had broken rings, none of the pistons were broken. The cam and lifters are still installed and will be removed tomorrow(maybe). The timing cover is setup for a mechanical fuel pump. The cam had a fuel pump eccentric installed.


Subscribe to:
Comments (Atom)