On the 21-22 of Feb, I discovered the engine idle was bad and that when in gear, at idle the engine was running poorly.
Today I was able to deal with that problem. I checked the fuel filter and found quite a few pieces of dark material in the filter. So I removed it and cleaned it and re-installed it. I then removed the 1405 from the car. After that I removed the metering rods and related hardware, then the top cover of the carb. In the metering rod channels there was the same type of dark material but smaller, used carb cleaner and sprayed those areas until clean. I also disassembled the floats and needles and sprayed with carb cleaner. I sprayed carb cleaner where ever possible throughout the carb and pieces/parts. I reassembled everything, fired up the engine and it idled like it should in and out of gear.
So I need to re-think how the current filter is setup and maybe add two filters.
Monday, February 25, 2019
Sunday, February 24, 2019
24 Feb 2019 - headlight relay kit
I spent yesterday and today installing the headlight relay kit I ordered from WCCC. The kit does not require cutting or modifying the original wiring harness in any way. So installation is pretty straight forward. The hardest part is deciding where to mount the relay packs and the circuit breaker for the kit.
I mounted the circuit breaker close to the battery so that I would have a short power lead. I had to do bit of trial fitting of the relay packs and power wiring until I got things where I wanted them. After deciding on the location I started working on the power wiring and circuit breaker locations.
Once I finished the preliminary installation, I tested the kit. The passenger side low beam bulb did not light, otherwise the high and low beams worked. So I replaced the passenger and driver side low beam bulbs at the same time and to make sure I had a matching set. The replacement low beam bulb is an H5006 part.
After replacing both bulbs, I did a quick check on the headlight bulb alignments and so far it looks good, need to test it at night.
 |
| passenger side relay pack and wiring connected. I used RTV to mount the relay pack to the radiator support, it wasn't meant to be permanent, but it might end up that way |
 |
| passenger side wiring |
 |
| driver side relay pack and wiring connected, except for the power wiring |

 |
| circuit breaker location |
 |
| close up of circuit breaker |
 |
| passenger side relay pack installed and power wiring connected. The 10 gauge black w/red strip is the power wire. It will be wrapped in protective tubing and will be mounted more securely |
 |
| driver side relay pack installed and power wiring connected. |
 |
| This is the bulb that is the low beam and is now installed on both sides |


Monday, February 18, 2019
18 Feb 2019 - headlighting upgrade
I decided to upgrade the headlight system, so today I ordered the headlight relay kit - full, Item #:
10499.
The WCCC website indicates that relay kit is a "drop in" to the electrical system of my 67. According to the website, no wiring will be cut, headlight electrical connections will use factory style connectors and the main power feed will connect to the battery via circuit breaker.


The WCCC website indicates that relay kit is a "drop in" to the electrical system of my 67. According to the website, no wiring will be cut, headlight electrical connections will use factory style connectors and the main power feed will connect to the battery via circuit breaker.


Sunday, February 17, 2019
17 Feb 2019 - driver side low beam headlight
Noticed during night driving that the driver side low beam seems to be too low. So I adjusted the driver side low beam headlight upwards. Will test next chance I get.
Saturday, February 16, 2019
16 Feb 2019 - Tires
All tires were low on pressure. The passenger side front was the lowest, 22 psi. The others were 5 psi low. Now all tires are at 32 psi cold. Will check later today and again tomorrow. Passenger side front may have a nail or something. Although I did remove that tire and visually inspect it, I didnt see any obvious problems.
Checked the passenger side front tire the next day and air pressure did not drop...still monitoring the situation...
Checked the passenger side front tire the next day and air pressure did not drop...still monitoring the situation...
16 Feb 2019 - radiator support - driver side
Today the radiator support area looks good. Now that I have noticed this, I will probably go over other areas in the engine bay and underneath the front end.
Friday, February 15, 2019
15 Feb 2019 - chassis saver - radiator support - driver side
Looks like I did not properly prep the driver side radiator support near the fender. So I sanded down the rusty, peeling paint and put one coat of chassis saver on the area. Directions on the can indicate 3-8 hours of dry time depending on humidity and temp. I put a coat on at 5 PM today, and will check it at 8 PM to see if I can paint a second coat.
Checked the area at 7:30 pm and it was dry and not tacky to the touch. So I applied a second coat. I will let that dry overnight and see how that turns out for tomorrow.
Checked the area at 7:30 pm and it was dry and not tacky to the touch. So I applied a second coat. I will let that dry overnight and see how that turns out for tomorrow.
Monday, February 11, 2019
11 Feb 2019 - Thermostat replacement -cont'd
After letting the RTV cure overnight, I filled the cooling system today. I fired up the engine to cycle through coolant and after about 20 minutes or so, the thermostat opened. Topped off the coolant and test drove car for about 30 minutes to make sure there were no leaks, no overheating.
 |
| Here is the engine temp at 50 mph cruising down the highway |
 |
| Here is the engine temp at 50 mph cruising down the highway |
Sunday, February 10, 2019
10 Feb 2019 - thermostat replacement
For some reason, the thermostat that is installed, slowly warms the engine up. The thermostat is a 180 degree unit. I decided to replace it today and install a Motorcraft 180 degree part. If that is still too cool, I aslo have a 192 degree Motorcraft thermostat that I can install.
At this point, the thermostat and housing, hoses/clamps are installed. I am letting the RTV cure overnight and tomorrow I will fill the cooling system and road test.
 |
| It is a 180 degree thermostat. It starts to open at about 165-168 and is fully open by 180 |
 |
| Thought I would test the unit before installation. It worked like it should, so it was installed. |
 |
| This is the RTV I used for this installation |


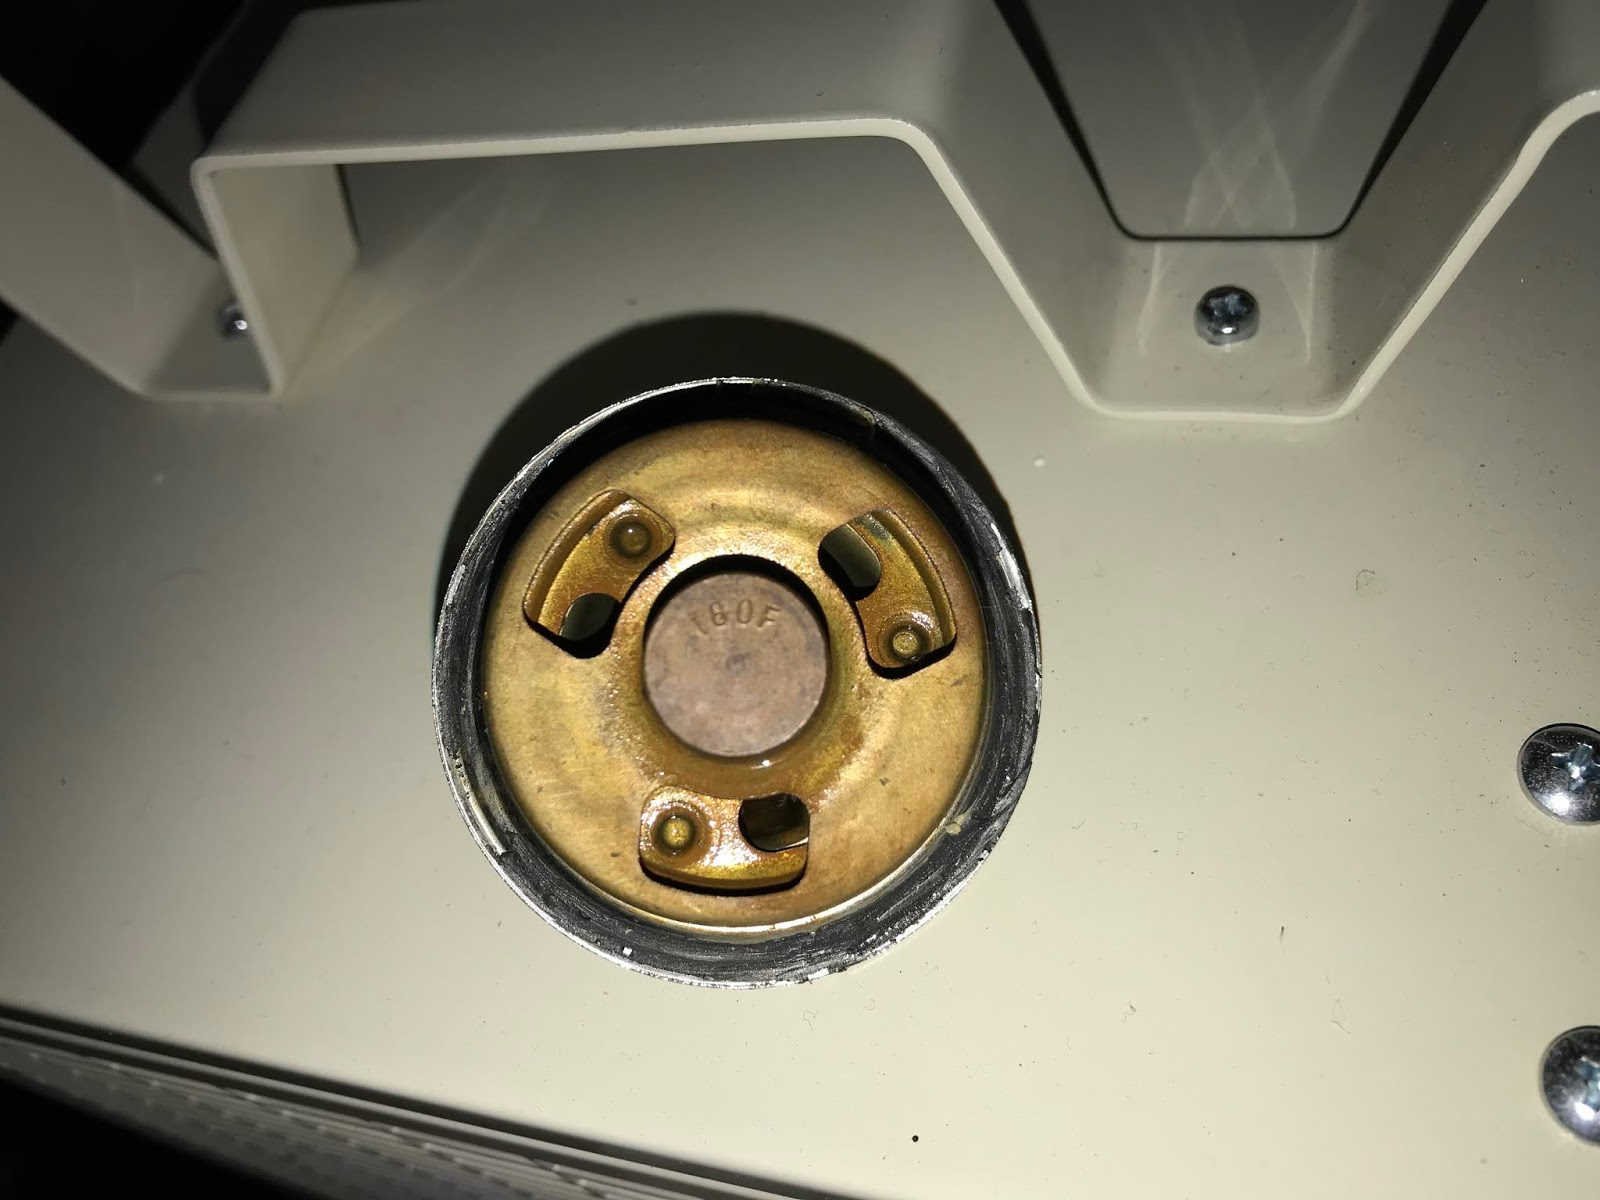 |
| This is the thermostat that ran very cool, it is a 180 unit but ran more like a 160 degree unit |
 |
| This is the thermostat that ran very cool |
Friday, February 1, 2019
1 February 2019 - Edelbrock 8190 fuel pressure
While driving today, the engine cutout about 7-8 times. It happened during accelleration, decelleration, up hills and down hills. Tank has just over half a tank. I did notice that the pressure regulator was indicating 6.5 PSI. I had previously adjusted it to 5 PSI. So I have adjusted it to 5 PSI and will monitor the situation.
These picture were taken with the engine warmed up and idling.


These picture were taken with the engine warmed up and idling.


Heres a video of the engine idling and the pressure set to 5 psi
Subscribe to:
Comments (Atom)