Search This Blog

Sunday, May 26, 2019

26 May 2019 - weather stripping and stuff

Today I installed the vapor barrier, door panel and weather seal for the end of the window(door lock end).

The passenger side door now has only one seal left to install.  Its the small seal that fits on the outside edge of the vent window.  It fits in between the door and vent frame, its about 8" long, about 1/8 wide.  To install that will require removal of the vent window frame assembly(not doing that right now).

I also installed the driver side front floor panel cover with insulation.  Tomorrow I will install the back seat pieces and then I should be able to start driving The Merc.


Replacement front panel.  It doesnt have holes pre-drilled for installation.  These fit very well.


OEM panel, little bit of wear and tear.  Didn't realize it had that much overspray...

Replacement door lock /panel grommets...They fit but not as good as originial.  They do take care of the noise the door lock knob was causing.

Top piece of pinch weld cover is new, bottom is OEM.  Found out while removing the driver side pinch welding that I had already replaced it recently, so now I have a spare piece.
This is the replacement vapor barrier.  Its the correct size but the holes/slots/openings are missing/close or right on.  I used a few magnets to keep the piece in place while I marked the spots that needed to be cut-out.

Heres the vapor barrier installed.  I used a sealer that was recommended for this type of installation.

This is the vapor barrier adhesive that I used.  It remains soft and pliable without running/sagging.
Door panel, moments from installation

Panel installed!  Two seals are left to be installed on this door.  Might do them this summer...

Monday, May 20, 2019

20 May 2019 - doors/weather stripping/parts

Received all parts today, and started installation of those pieces/parts.

Saturday, May 18, 2019

18 May 2019 - door weather stripping / door panel weather stripping

Passenger side door
  • installed the door panel belt line weatherstrip
  • installed the window run weather strip(piece that runs up/down door track, vent window track)
  • installed window onto window lift mechanism
Passenger side door TODO
  • install vapor barrier
  • install door panel
  • install door lock grommets 


Tested the passenger side door latch/handle.  So far its working as intended.

Driver side door latch/handle assembly is also working as intended after replacement.

Waiting on a few more parts before I install the door panels.

Monday, May 13, 2019

13 May 2019 - Weather stripping and stuff

Driver side door
  • all weather strips and weather seals have been installed for the vent window and door window
  • forgot to install the vapor barrier, but thats okay still have to do some corrosion control inside the door
  • not all of the door panel clips are attached to the door panel
  •  
  •  

Passenger side door
  • only installed the upper door area weather strip/seal
  • door window belt line strip was installed on door
  •  

Todo
  • finish installing passenger side replacement door window crank assembly
  • install passenger side vent/door window glass run
  • install vent window weather stripping
  • install vent window seal on outer edger of vent window
  • install door perimeter weatherstripping
  • install vent window rubber tip seal
  •  
  • install rear interior quarter trim panel weather stripping

Saturday, May 11, 2019

11 May 2019 - Weather stripping - driver side door area - passenger side door area

Still working on the weather stripping on both doors.  Today I installed the upper door area weather stripping and used weatherstripping adhesive.  As I finished installing/gluing the weather stripping I closed the quarter windows and door windows and made sure the weather stripping was properly seated.  I will let those pieces dry overnight.
 
I started working on replacing the driver side door belt line weather strip.  That piece required removing the old staples and using the new belt line strip to mark new staple holes for drilling.

Since none of the holes on the new belt line strip didn't match, I installed staples and secured the vinyl, then I started the process of drilling the new holes in the door panel and installing new staples.  I now have the driver side belt line piece installed.  Next step is to replace the door panel clips with news then install the door panel.

The passenger side door belt line strip still needs replacement, I will do that tomorrow.

Sunday, May 5, 2019

5 May 2019 - Weather stripping - driver side door area - passenger side door area

Still working on installing weatherstripping for driver and passenger doors and door areas.

Driver side door and area now has all new seals and weather stripping, waiting for the door lower weatherstrip to dry overnight.

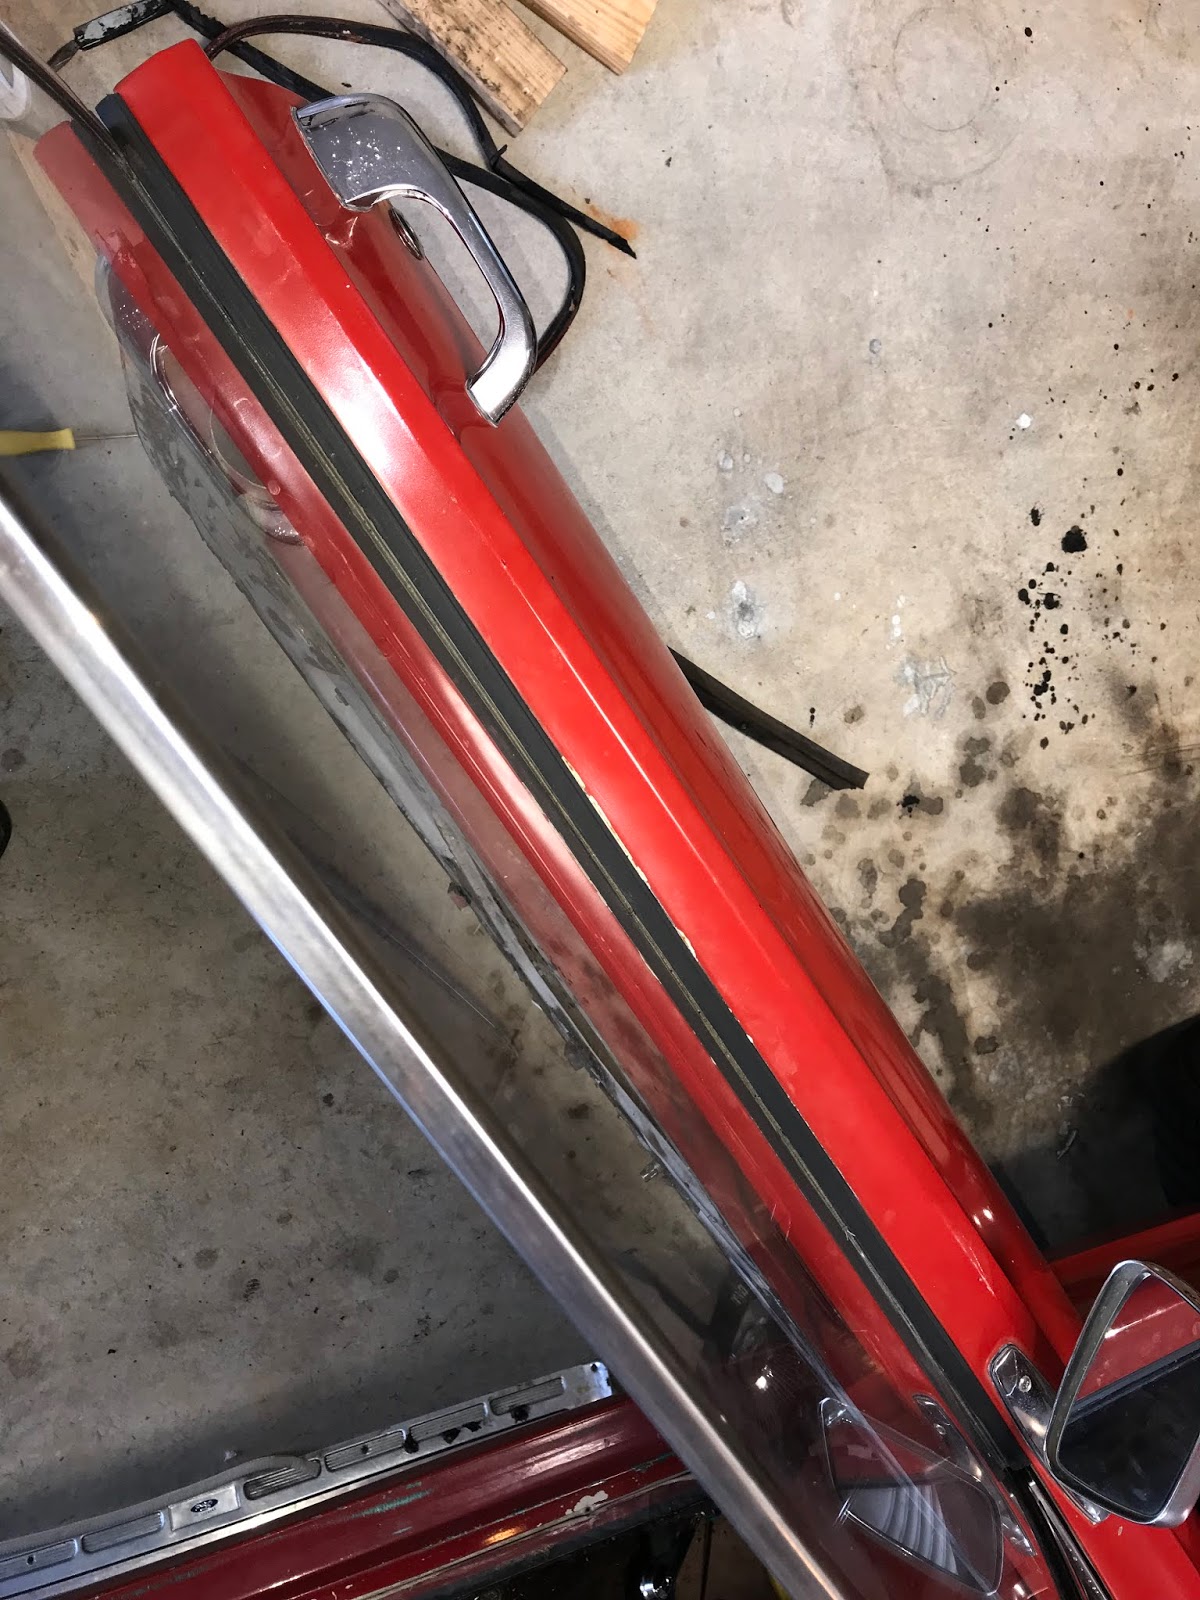
Driver and passenger side - installed replacement door handles.

Driver and passenger side doors are prepped for installation of vapor barriers - ordered a tube of non hardening sealer - should be here wednesday.

Passenger side door window mechanism has been removed.  The gear head fell apart while rolling up the window with new door seals installed!?!?!  The replacement unit should arrive this week, then I can finish up the passenger side door.

Driver and passenger side door areas - upper area.  Installed seals for both sides but did not finish - need a tube of black weatherstrip adhesive

  • Still need to install weather strips onto both rear seat quarter panels.
  • Still need to install weather strips onto both door panels
  •  
  •  

Saturday, May 4, 2019

4 MAy 2019 - Weather stripping - driver side door area - passenger side door area


4 May 2019 - Weather stripping - driver side door area - passenger side door area

Continued with installing driver side window and vent window assemblies.  Managed to get the driver side window and vent window installed.  Still need to make minor adjustments to get the window aligned to door and door opening.

Installed the upper door channel weather stripping that runs from the front of the door area to the quarter window.  I did not use adhesive at this time...

cleaned the driver side door lower area so that the lower weather stripping can be installed( that took a ridiculous amount of time).

Removed the driver side interior rear quarter panel to make room to install weather stripping.  Had to remove the entire back seat to do that.

Started cleaning driver side door area where vapor barrier will be installed.  Once the adhesive arrives I will install the vapor barrier.

Friday, May 3, 2019

3 May 2019 - Weather stripping - driver side door area - passenger side door area

All weather stripping/seals have arrived.  Next time I'll start off with ordering before I start working.

The driver side vent window assembly is together and installed on the frame.

Managed to install a few pieces of weather stripping today.  Driver side, I forgot to install a very small piece of weather stripping on the outside edge of the vent window.  So I did that today and now that needs to cure overnight.  On the driver side door, I replaced the door side of the belt line piece.  The door panel piece still needs to be installed.  

Replaced the door bumpers(4) for both doors.

Passenger side, I replaced the quarter window vertical piece and the quarter window rubber piece.

I layed out the long pieces of weatherstripping for the door perimenter up and lowers.

I attempted to replace the upper door perimeter seal on the passenger side and ran into a problem with loosening/removing the screw that holds the piece in place.  So I am soaking the piece in oil overnight, hopefully it will be easier to remove tomorrow.

On the passenger side rear quarter panel I started replacing the small weather strip.  It is stapled to the panel.  I was able to remove the piece but damaged on spot where staples will need to be installed.

Passenger side I replaced the door side belt line piece.  I then attemped to roll the window up(much more resistance now that there is a seal in place) and the lift mechanism failed.  The inner crank seperated internally, so now that window does not operate up/down at all.  I ordered a replacment.

Driver side door and passenger side door;  there were several rust spots, so I painted the areas with chassis saver.

So in the mean time I am waiting for a seal to cure, oil to soak some fasteners and to come up with a way to re-install staples into 50+ year old interior quarter panels...but overall a good day!

Checked on the screws that hold the upper door weather stripping in...had to use an impact driver to loosen the fasteners.  So now those screws are out.  Tomorrow I will remove the rubber pieces and install replacements.

Thursday, May 2, 2019

2 May 2019 - weather stripping - driver side door and area

Started installing weather seals and rubber pieces today.  The vent window seal is installed, as is the weather stripping for the window run attached to the vent window.  There is a vent window seal that is attached to the outer front edge of the vent window that needs to be installed, but it cannot be installed until the vent window position is determined.

The vent window glass is installed in the window frame, but the fasteners for the vent glass piece are soaking in Evapo-Rust overnight.  Tomorrow I will then install those pieces then install the vent window assembly into the door.

I also installed the quarter window to door window seal, and the lower quarter window door seal.

I used some chassis black to deal with a little bit of corrosion on the driver side door in various areas.  I also used chassis black on the door window channel that the glass mounts to, and it is now drying/curing.  I might put another coat on those area tonight.

Wednesday, May 1, 2019

1 May 2019 - Driver side door stuff and other things

A few more door/window seals arrived today.  Still waiting on one more seal for the lower perimeter of the door, then I can begin putting things back together.

1 May 2019 - Driver side window crank assembly

Parts arrived to replace the driver side window crank assembly.  During disassembly I discovered I should have ordered a couple of weatherstripping seals.  Now those parts are on order, and then the re-assembly shall begin.