Sunday, August 28, 2016
28 August 2016 - thermostat and housing
I bought a Mr. Gasket thermostat housing. Looks like that O-ring style should seal better than the style I currently have installed. I cleaned up the rough edges of the housing and prepped it for installation. I bought a 180 degree thermostat and tested, and it works.
28 August 2016 - rear engine cover - flex plate
I finally installed the rear engine cover and flexplate today. I used red threadlocker and torqued the fasteners to 85 ft-lb.
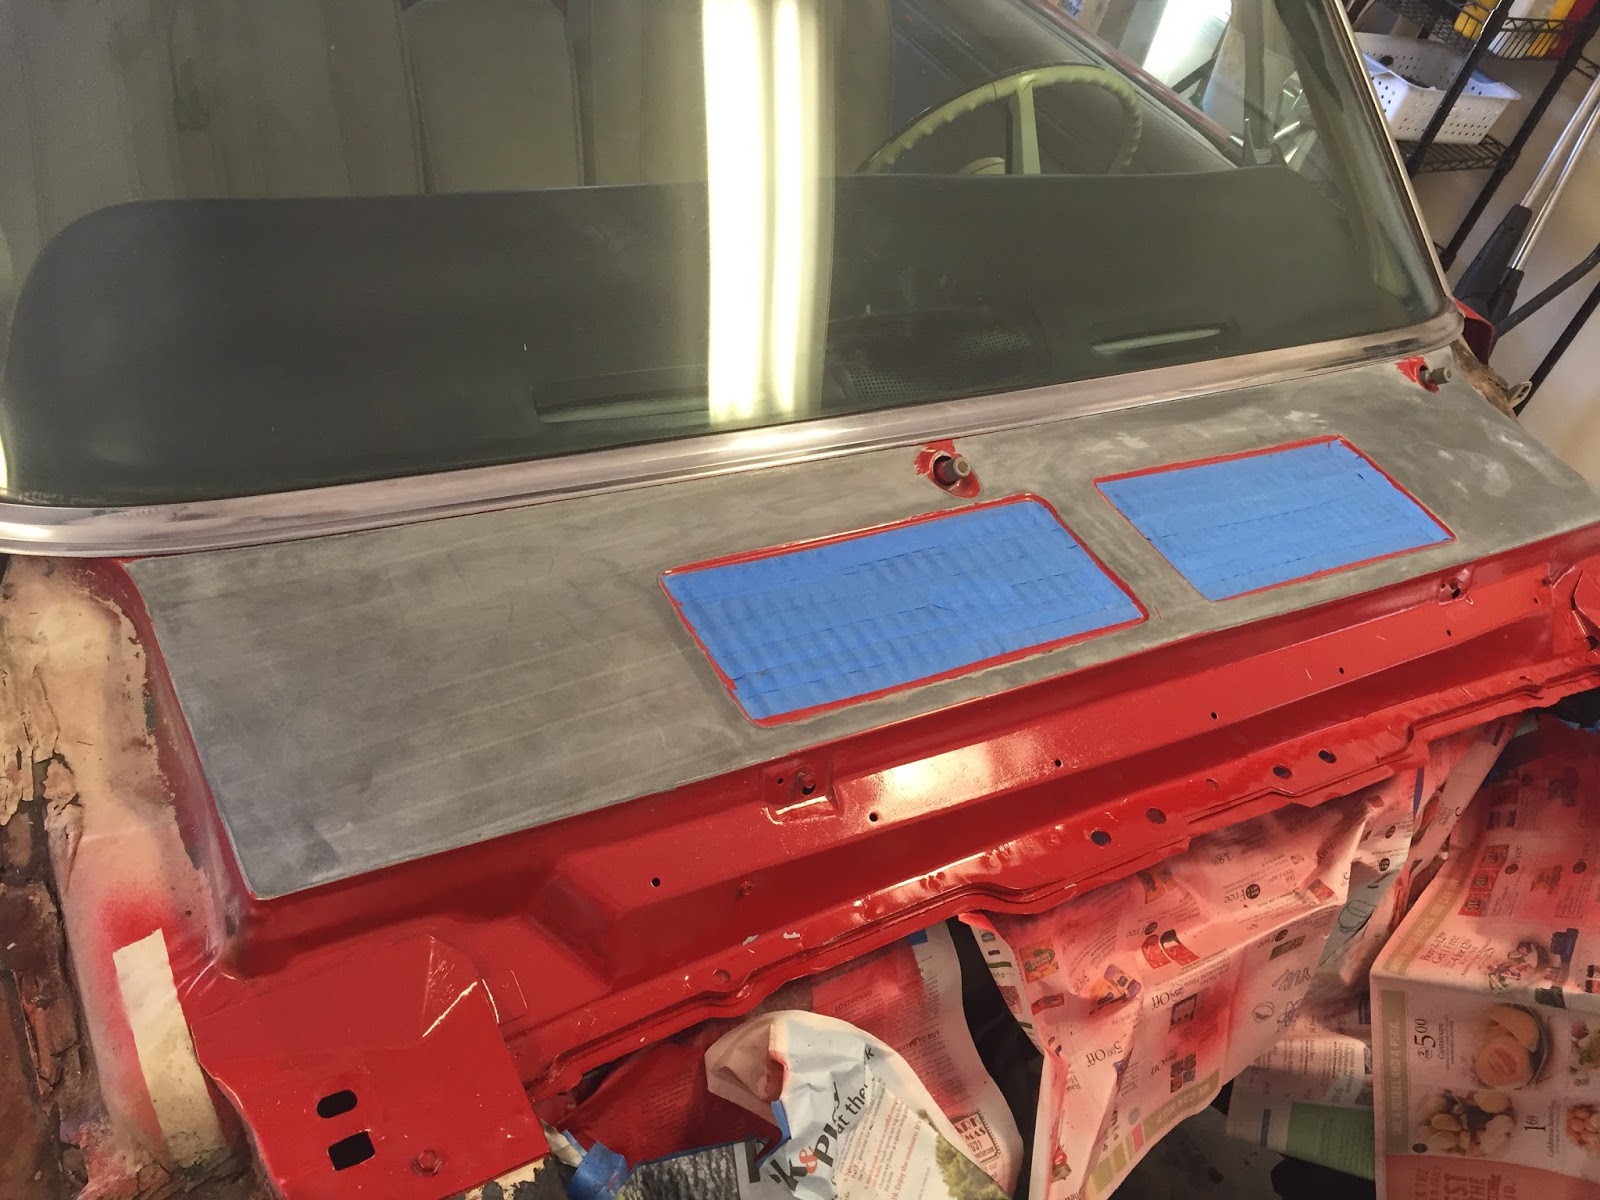
I also did a littel touch up paint in the engine bay and installed the shock tower mounts.
I ordered a couple of parts about a week and a half ago( intake manifold to heater elbow and the firewall hood seal) I will install the elbow today but the seal won't go in until much much later.
I also did a littel touch up paint in the engine bay and installed the shock tower mounts.
I ordered a couple of parts about a week and a half ago( intake manifold to heater elbow and the firewall hood seal) I will install the elbow today but the seal won't go in until much much later.
Tuesday, August 23, 2016
23 August 2016 - engine
I started setting the engine up for installation of the flexplate. I had to put the engine on the roll around engine cradle so that the flexplate can be mounted.


Sunday, August 21, 2016
21 August 2016 - engine bay - cleanup/prep work
I painted the two shock tower mounts and the tops of the shock towers. The paint on the shock towers is very temporary. I sprayed a rust converter on the shock tower tops just to get that rust squared away for now.
The mounting hardware for the shock tower mounts has been cleaned up and is ready to use. I did not paint the fasteners. After they are installed I will paint that hardware.


The mounting hardware for the shock tower mounts has been cleaned up and is ready to use. I did not paint the fasteners. After they are installed I will paint that hardware.
 |
| shock tower mounting hardware - cleaned up after soaking in evapo rust. I will installed this hardware then paint it. |
 |
| shock towers with shock mounts removed |
 |
| passenger side shock tower |
 |
| driver side shock tower |


 |
| I used a flat black rust converter and sprayed this area to deal with the potential rust issues. |
 |
| shock tower mounts painted - takes several days to cure... |
 |
| here are the engine mounts and shock mounts |
Saturday, August 20, 2016
20 August 2016 - engine bay
Continued with cleanup of the engine bay area. I removed the top shock absorber mounts and hardware to cleanup, paint and re-install. Currently the bolts, nuts and mounts are soaking in Evapo-Rust. Tomorrow the parts should be rust free and ready to paint - weather permitting. I need to clean up the tops of the shock towers to get ready for painting.
I noticed that the top area of the firewall, just below the cowl vent inlet grill, that I did not paint enough coats of the primer sealer - I can see bare metal in some areas.
The top of the shock towers need to be cleaned up and prepped for painting


I noticed that the top area of the firewall, just below the cowl vent inlet grill, that I did not paint enough coats of the primer sealer - I can see bare metal in some areas.
 |
| Red arrows indicate where I see bare metal thru the primer sealer. Looks like I will need to sand those areas and put down primer sealer again. |
 |
| Here you can see the shiny bare metal, because I didn't spray the primer sealer well enough - I will have to sand that down to bare metal in those areas and re-apply the primer sealer again... |
The top of the shock towers need to be cleaned up and prepped for painting
 |
| Not really sure how to clean up those mounting holes... |


Friday, August 19, 2016
19 August 2016 - engine bay - outside - driver side
While cleaning up the inside of the engine bay I started cleaning up around the various holes on the driver's side of the engine bay/shock tower area. I started cleaning up the suspension side of the engine bay at the shock tower. I thought it would be a good idea to clean/prep the holes for painting/rubber coating.


 |
| Yellow circles are the holes that are being cleaned/prepped on the other side... |


 |
| Red circles show where there are problems noted with the suspension - in this case, the rubber insulation for the spring perch and coil spring pad are worn out! |
 |
| Yellow areas indicate where cleaning/prepping for paint needs to be done. Red areas indicate missing/damaged rubber insulation... |
Sunday, August 14, 2016
14 August 2016 - supplies
I need to pick up the following items;
- sandpaper - 1500 grit, 800 grit, 600 grit, 400 grit, 320 grit
- sanding block
- tape - but the kind for automotive painting
- couple more cans of chassis black
- plastic paint scrapers
- metal paint scrapers
- ???
14 August 2016 - Cowl Vent / air inlet grill area
I decided to primer the area since it was bare metal. I stripped the paint from the panel area then prepped it for primer. It doesn't look too good after putting the primer down but at least the panel is covered. I will have to get back to that sometime later.


 |
| This is the primer I used on the cowl vent / air inlet grill area, used 2 cans just for that area |


Saturday, August 13, 2016
13 August 2016 - cowl vent / air inlet grill
I need to do a little research into how to paint an area temporarily.
I don't kow a thing about autobody repair/painting. But I bought a couple cans of gray primer. I will put that on the cowl vent/air inlet grill area for a short term fix, as I need to have that bare metal protected.
I don't kow a thing about autobody repair/painting. But I bought a couple cans of gray primer. I will put that on the cowl vent/air inlet grill area for a short term fix, as I need to have that bare metal protected.
13 August 2016 - cowl vent / air inlet grill area
I started cleaning the firewall area up by the cowl vent / air inlet grill area. I painted the area red and was considering doing a second coat but changed my mind since it turned out ok. Well after peeling the tape off of the masked areas, paint pulled up with the tape.


So I thought I would just clean/prep those areas that peeled up. That didn't work out so well. The paint in the cowl vent/air inlet area literally flaked off the panel. So I cleaned up the panel except for the the grill work.


So I thought I would just clean/prep those areas that peeled up. That didn't work out so well. The paint in the cowl vent/air inlet area literally flaked off the panel. So I cleaned up the panel except for the the grill work.

 |
| The wiper arms needed to be removed....didn't know how to do that safely...so I looked it up online and turns out there was a pretty simple procedure for that. |

 |
| I will clean up these areas and re-paint |

Friday, August 12, 2016
12 August 2016 - engine bay / firewall
Cleaned up the firewall area at the top where the air inlet grill is located. I used a Walmart brand paint called ColorPlace Rust Control Spray Enamel. I bought gloss fire red and flat black. The gloss fire red will be used to paint the upper area of the fire wall. And the flat black will be used to paint the area below that area into the engine bay.


 |
| This is the first coat/layer today at 8 pm. I will paint it again on the 13th if needed. |


Thursday, August 11, 2016
11 August 2016 - engine bay clean up / prep for paint
Started cleaning up the firewall of the engine bay. There is a type of soft tar like sealer in place and needs to be removed.
Also worked on the mounting bracket for the power brake booster. The plate did not quite line up on the brake booster mounting studs. After a little persuasion, the plate fits nicely.


Also worked on the mounting bracket for the power brake booster. The plate did not quite line up on the brake booster mounting studs. After a little persuasion, the plate fits nicely.
 |
| Started installing the brass fittings on the intake manifold. Also installed an oil filter to keep dust/debris out of that area. |
 |
| Brake booster firewall mount location. Still need to finish cleaning/prepping that area so I can paint it. |
 |
| Working on cleaning this area up then paint that area red |


Subscribe to:
Comments (Atom)