Sunday, December 30, 2018
30 December 2018 - Edelbrock 1405
I have driven the car on the open road several times now. There is a slow leak at the 8190 fuel pressure regulator. The outlet port that is blocked has a slow leak. So I have replaced the 3/8" npt fitting that came with the 8190 with a different style of fitting. It is a 3/8" npt plug that has an 11/16 size bolt head. I have done a couple of engine starts/runs to check for further leaks, and so far its not leaking. Will continue to monitor.
Saturday, December 29, 2018
29 December 2018 - Edelbrock 1405
I started the car and ran it for a few minutes to check for fuel leaks. Found a leak pretty quickly. At the fuel pressure regulator, the output port was leaking. The -6an male to 3/8" npt male fitting was leaking at the 3/8" end. It didn't matter how much it was tightened or how many times I removed it, to re-wrap it with teflon tape, it would leak within a 15 minutes or so. I removed it and used another -6an to 3/8 npt fitting and it worked without issues. I took a closer look at the -6an adapter fitting and cannot see why it leaks.
So after that, I let the engine run and warm up. I plugged in a vacuume gauge and at idle there is 16" hg. And its much more stable than with the Holley. The idle is also much smoother than the Holley. I really thought I had that Holley setup right.
I adjusted the idle mixture screws for best idle/vacuume and went for a drive. Seems to be ok, but it started to rain, so I headed back to the garage. First chance, I will do a proper shake down.
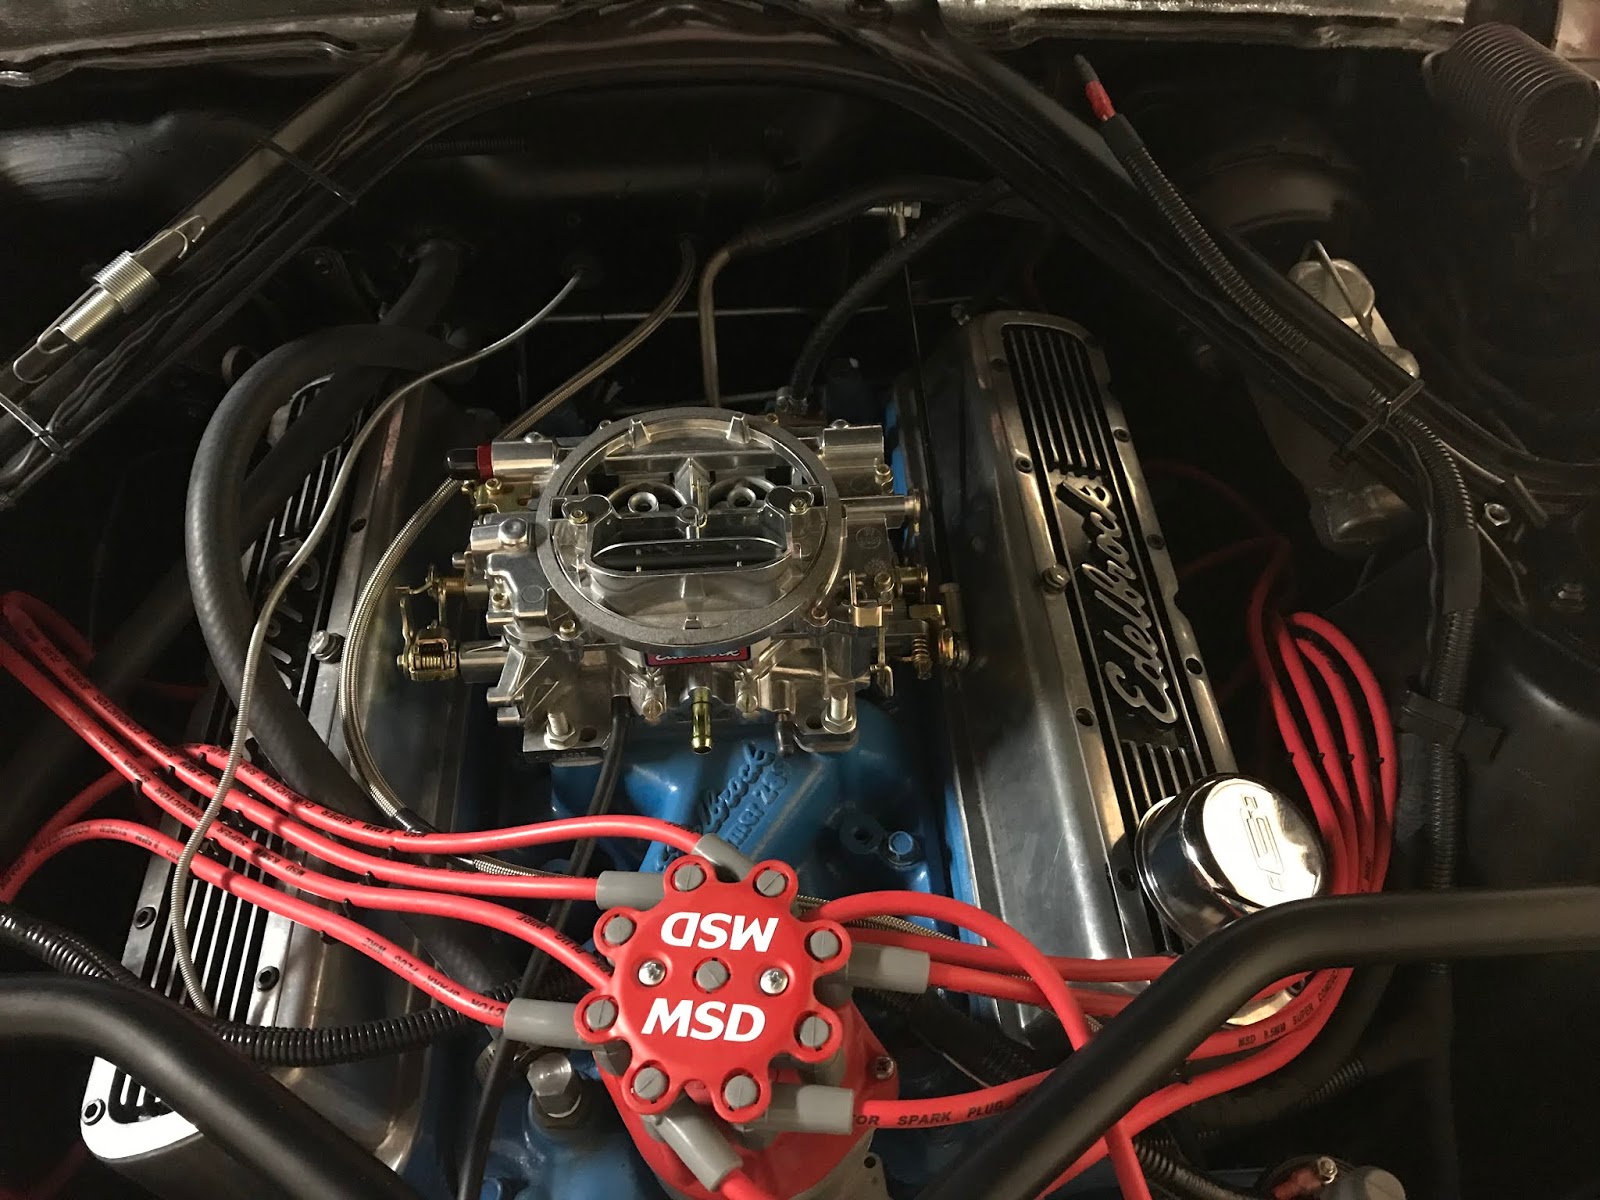
Throttle response is very quick/smooth with the 1405.
So after that, I let the engine run and warm up. I plugged in a vacuume gauge and at idle there is 16" hg. And its much more stable than with the Holley. The idle is also much smoother than the Holley. I really thought I had that Holley setup right.
I adjusted the idle mixture screws for best idle/vacuume and went for a drive. Seems to be ok, but it started to rain, so I headed back to the garage. First chance, I will do a proper shake down.
Throttle response is very quick/smooth with the 1405.
Friday, December 28, 2018
28 December 2018 - Edelbrock 1405 installation
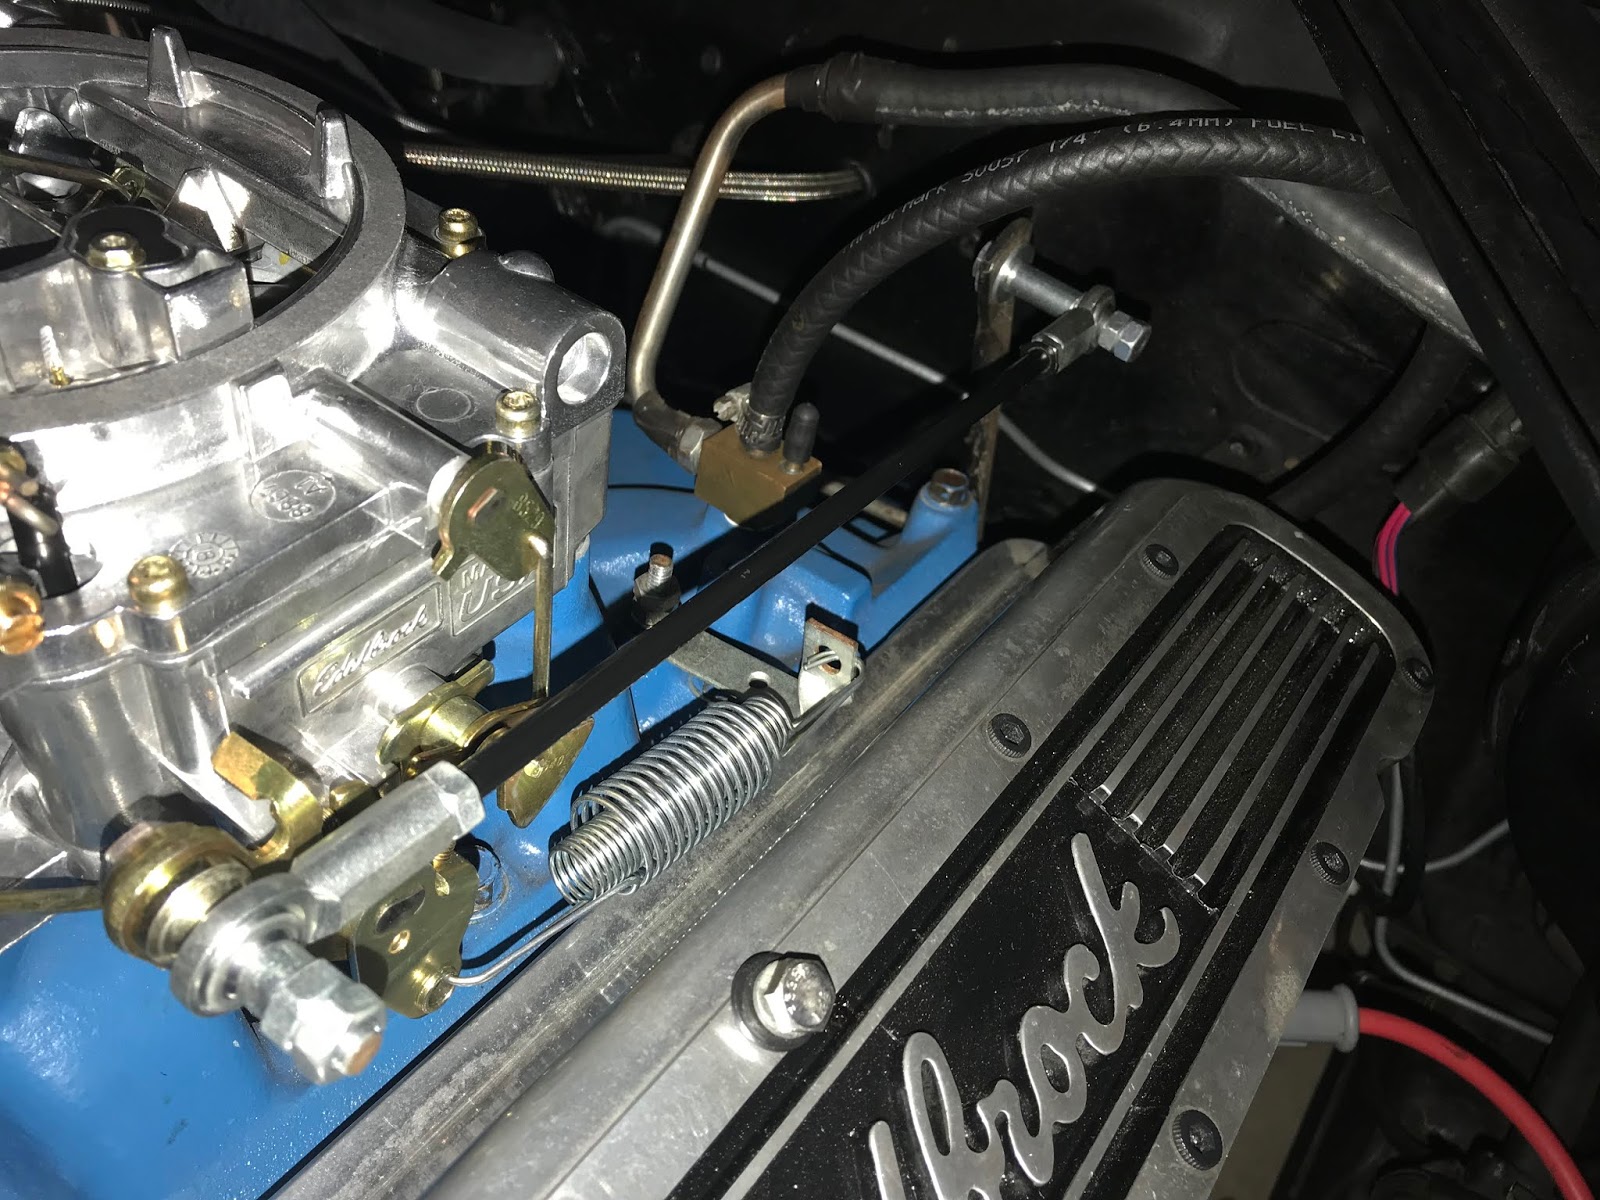
I mounted the fuel pressure regulator on the driver side shock tower. I mounted it so that I can access all of the fuel ports to make adjustements and such. I decided to use the -6an fitting on one of the output ports of the fuel pressure regulator, the other output is blocked off. By doing that, I can use a couple of lengths of -6an hoses and fuel filter to connect to the edelbrock carb. The input port of the fuel pressure regulator uses a 3/8" npt to 3/8 fuel barb. The output of the mechanical fuel pump uses a 1/4" npt to 3/8" fuel barb. I used a 3/8" rubber fuel line from the mechanical fuel pump to the fuel pressure regulator. The fuel pressure regulator has a 1/8" npt port for a fuel pressure gauge, and I installed a gauge in that port.
Right now, everything is installed/connected and ready for a pressure test/engine start. Its raining today so I will hold off until tomorrow.


Right now, everything is installed/connected and ready for a pressure test/engine start. Its raining today so I will hold off until tomorrow.

 |
| Top view, -6an hoses from carb to fuel pressure regulator. I will have to wrap areas of the SS hoses so that other hoses and areas do not get damaged by the abrasiveness of the hose. |

 |
| Edelbrock 8190 fuel pressure regulator installed. Outlet port with a -6an male to 3/8" npt male fitting. Inlet port has a 3/8" npt to 3/8" fuel barb. Gauge port has a Fragola 0-15 psi gauge that I already spilled gas on the faceplate! |

 |
| Heres a shot of the mechanical fuel pump to fuel pressure regulator. At this time I am using a rubber hose. I would like to replace that with hose with -6an fittings(doing research to find the right length hose) |
Thursday, December 27, 2018
27 December 2018 - Edelbrock 1405 installation
Started the installation of the Edelbrock 1405. I had to remove the Holley 1850 and the -6an fuel lines used on the holley and from the mechanical fuel pump.
I have the 1405 bolted in place, connected the pcv hose and distributor vacuum hose. I am currently working on installing/using the -6an fuel lines. I used a strong magnet to stick to the fuel pressure regulator mounting bracket so that I can check some ideas I have as to where to place the regulator. I would like to use as many of the -6an fuel lines as possible. I don't think I will be able to use one from the mechanical pump to the pressure regulator at this time. The -6an hoses I have are too long or too short to make the connection from pump to regulator. Short term plan is to use 3/8 fuel line from the pump to regulator.


I have the 1405 bolted in place, connected the pcv hose and distributor vacuum hose. I am currently working on installing/using the -6an fuel lines. I used a strong magnet to stick to the fuel pressure regulator mounting bracket so that I can check some ideas I have as to where to place the regulator. I would like to use as many of the -6an fuel lines as possible. I don't think I will be able to use one from the mechanical pump to the pressure regulator at this time. The -6an hoses I have are too long or too short to make the connection from pump to regulator. Short term plan is to use 3/8 fuel line from the pump to regulator.
 |
| Here are some of the parts that might be used for the Edelbrock 1405 installation |
 |
| Here is the 1/4" npt to 3/8" fuel barb fitting. I will be using this on the output of the mechanical fuel pump. |
 |
| Started removing the fuel line from the Holley |

 |
| bolted in! |
 |
| Installed the distributor vacuume line, the pcv hose and the throttle linkage |
 |
| had to use a different return spring mounting bracket. |

 |
| have a couple -6an lines and fuel filter connected but just for reference purposes. Trying to determine best layout of the fuel lines/fuel filter |
 |
| This looks like the spot I will be mounting the fuel pressure regulator. If it goes there, I need to be mindful of all connections and accessibility to the connections and fuel pressure gauge. |
Tuesday, December 25, 2018
25 December 2018 - Edelbrock 1405 carb stuff
I will be installing an Edelbrock 1405 carb. The mechanical fuel pump outputs 6.5 PSI. So I will need to install an adjustable fuel pressure regulator to keep the pressure down to 5-5.5 PSI. The plan is to install the edelbrock 1405, fuel pressure regulator but use rubber hoses temporarily until the carb is setup for the car. Once the carb is dialed in, and I see if I like the way the Edelbrock runs vs the holley, I will replace the rubber fuel lines with -6an hoses and fittings for a permenant setup.


Saturday, December 22, 2018
22 December 2018 - 14" wheels
I ordered a set of four, 14" steel wheels that are supposed to be the exact size of what is installed on my car. The Ford shop manual indicates that 14x5 is factory. I know the car has 14" wheels, I have had several sets of tires replaced over the years and 235/60R14 is the tire size. I never thought to measure the width of the rims until recently when I began considering replacing the steel wheels, and I also wanted to have a full size spare.
I have not removed the wheels from the car to check the rim width measurement, but I did check the backspacing and other measurements for that size rim and they match the book.
This set of steel wheels were ordered from John's Classic Cougars. These wheels, first look, seem to be in better shape then what is on my car. I will be cleaning these up over the winter.

Here are the steel wheels after cleaning up with a brush and dish soap


Tuesday, December 18, 2018
18 December 2018 - Monte Carlo bar installation
I installed the cross brace today. The fender/shock tower mounting brackets installed pretty easily. The cross bar required installing one side to a bracket and then applying a small amount of pressure to seat the other side in and then install the bolt. I am curious as to how this will affect the alignment making a small adjustment like that.


Monday, December 17, 2018
17 December 2018 - engine bay - monte carlo bar
I received the monte carlo bar today. I started checking on installation, and found that the MSD box located on the passenger side tower needs to be moved lower. The spark plug wiring will need to be adjusted as well.
Sunday, December 16, 2018
16 December 2018 - Driver side - fuel line replacement
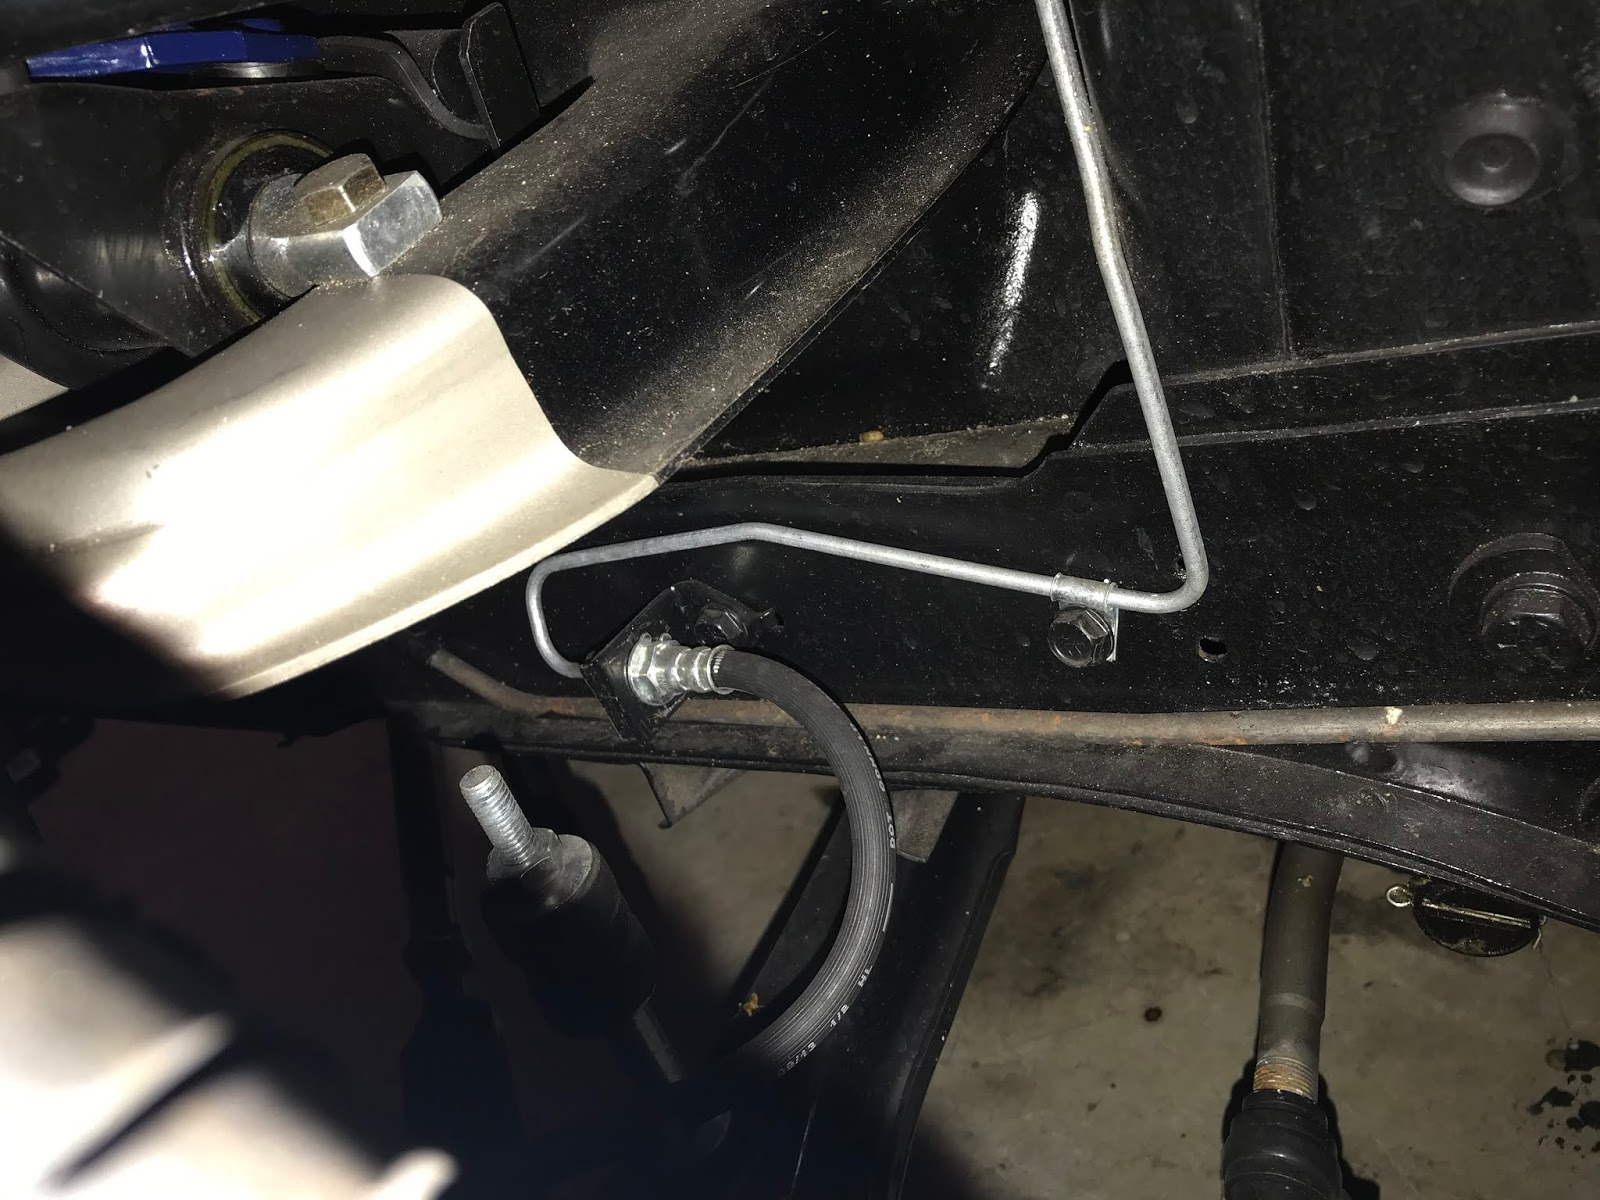
I've been looking at the routing, type of fuel line and other things like that in regards to the fuel line that runs from the driver side floor board to the fuel pump inlet.
I would like to replace that section of fuel line with one type of fuel line, a -6AN nylon braided hose.
The plan is the use -6an male to 5/16" hard line adapter, then connect a -6an female hose(both ends) from that hard line connection all the way to the fuel pump inlet.
Its about 5' of hose from the fuel pump inlet to the driver side floor board section.


16 December 2018 - Edelbrock
I decided to buy a brand new Edelbrock 1405 carb. I have always used Holley carbs, so this is going to be a learning experience.


16 December 2018 - refurb'd 1405
While checking the floats, gaskets, linkages and stuff to make sure everything is to spec. I noticed that the front and rear jets were marked up. I attempted to remove them and replace them with new jets. I was able to remove just one jet with just a screw driver. The other three could not be removed that way. So I attempted to drill/tap the jets to remove them. I was able to do one jet successfully but the other too I went too wide on the drill point or too deep. Now that carb is a POS thanks to my lack of skillz. As soon as I can I will just take the hit, and buy a brand spank'n new Edelbrock 1405. In the mean time I'll keep using the holley.
Thursday, December 13, 2018
13 December 2018 - Refurbished 1405
The Edelbrock 1405 I ordered from Ebay has arrived. Even though it was advertised as being completely refurbished, I ended up having to replace several pieces.
The step up piston assemblies were in bad shape and would not move freely. I replaced them with spares and they now work as they should.
Also replaced the metering rods with new components.
I also had to replace the accelerator pump plunger assembly. It looked well used, the plastic was discolored.
The idle mixture screws were also in need of replacement. I had a kit and installed those pieces.
I still need to check the pump jet assembly to make sure the components are useable.
Wednesday, December 12, 2018
12 December 2018 - fuel system pieces-parts
I received the Edelbrock 8190 fuel pressure regulator, -6an fittings for the Edelbrock fuel pressure regulator.
I didn't realize it but the 8190 has a port for a fuel pressure gauge.
I didn't realize it but the 8190 has a port for a fuel pressure gauge.
 |
| Edelbrock 8190 Fuel pressure regulator, -6an to 3/8" NPT fittings, 3/8" NPT plugs, 3/8" NPT hex head plugs |
Tuesday, December 11, 2018
11 December 2018 - black windlace - cont'd
Today I was able to install the inner roof rail windlace along the back of the roof and over the back window. I would like to install windlace on the overhead piece that spans the driver and passenger side.


Monday, December 10, 2018
10 Decemeber 2018 - black windlace
I received the black windlace today. I will be installing that on the inner roof rail.
I purchased 18 feet of the black windlace. I was able to install about 6 feet. I will install more of the windlace on the inner roof rails in the back seat and across the back windshield when I get the chance.


I purchased 18 feet of the black windlace. I was able to install about 6 feet. I will install more of the windlace on the inner roof rails in the back seat and across the back windshield when I get the chance.
 |
| This is the stuff...its not concourse correct, and I don't care, it looks cool to me, especially where I installed it. This was purchased from Mustangs Plus, PN:1182, MPN:20-2022 |
 |
| Here it is installed, this pinch molding(windlace) is a PITA to install aroud this bend where the visor mount is located, hopefully it will stay in place |


These are images of the aft area of the roof rails without the windlace


Subscribe to:
Comments (Atom)